
Side Dishes
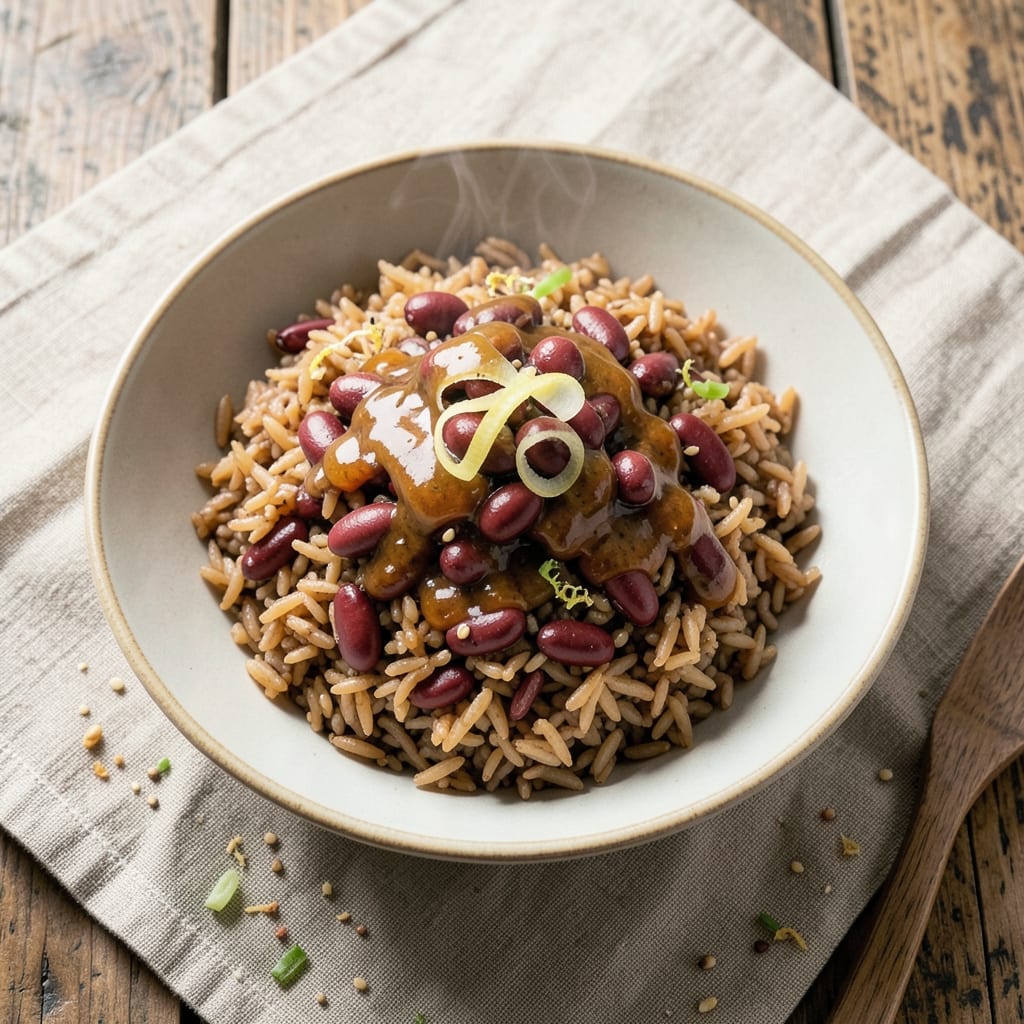
This adzuki beans and brown rice recipe delivers the perfect harmony of sweet and savory flavors, inspired by traditional Japanese bento boxes. The combination of tender adzuki beans and nutty brown rice creates a satisfying, protein-rich dish that’s both comforting and balanced. I’ve refined this recipe to highlight the natural sweetness of the beans while keeping the preparation straightforward—no complicated techniques required.
The beauty of this dish lies in its simplicity: soaked adzuki beans simmer into a rich, slightly sweet stew, while brown rice cooks up fluffy and hearty. The key is balancing the flavors—just a touch of soy sauce, mirin, and a hint of ginger elevate the beans, while the rice absorbs their aromatic essence. This recipe works as a standalone meal or pairs beautifully with miso-glazed vegetables or pickled radishes for a complete bento experience.
What makes this recipe stand out is its versatility—it’s vegan, gluten-free, and packed with plant-based protein, making it ideal for meal prep or a wholesome weeknight dinner. The adzuki beans soften into a creamy texture, while the brown rice adds chewy substance, creating a dish that’s both nourishing and deeply satisfying. The result is a plate that’s as visually appealing as it is delicious, with layers of color and texture.
Ready in about 45 minutes, this recipe is perfect for those who want a flavorful, nutrient-dense meal without spending hours in the kitchen. Whether you’re serving it for lunch or packing it for work, the combination of sweet-savory adzuki beans and brown rice will leave everyone asking for seconds. Let’s get started!
Ingredients for adzuki beans and brown rice
These twelve ingredients create a harmonious vegan bento inspired by Japanese tradition.
| Ingredient | Amount | Notes |
|---|---|---|
| Adzuki Beans (Dried) 🌱 | 1 cup | Soaked overnight, drained |
| Brown Rice 🍚 | 1 ½ cups | Uncooked, long-grain preferred |
| Water 💧 | 4 cups | For cooking rice and beans |
| Soy Sauce 🍶 | 2 tbsp | Gluten-free tamari preferred |
| Mirin 🍶 | 1 tbsp | Sweeter than regular mirin |
| Fresh Ginger 🧄 | 1 tbsp | Finely grated, peeled |
| Sesame Oil 🫒 | 1 tsp | Toasted for aroma |
| White Miso Paste 🍶 | 1 tbsp | Rich umami flavor |
| Rice Vinegar 🍶 | 1 tbsp | Balances sweetness |
| Sesame Seeds 🥜 | 1 tsp | Toasted for garnish |
| Salt 🧂 | ½ tsp | Diamond Crystal preferred |
| Sugar 🍯 | 1 tbsp | Light brown preferred |
Adzuki beans are the heart of this dish—look for plump, evenly sized beans at specialty stores or bulk bins. Nishiki Market carries high-quality dried adzuki, or check the international aisle at Whole Foods. Soaking overnight reduces cooking time and improves texture. Brown rice should be organic or Japanese short-grain for ideal chewiness. The ginger needs to be fresh and aromatic, not woody or dried out. For the miso, Miso Master or Hodo brands deliver authentic umami without artificial additives.
No mirin? Substitute 1 tbsp rice vinegar plus 1 tsp sugar—it won’t be identical but works in a pinch. Fresh ginger unavailable? Ground ginger at half the amount, though texture will differ. The sesame oil should be 100% pure, toasted—cheap varieties taste bitter. For extra depth, add 1 tsp grated daikon radish to the bean mixture. The rice vinegar balances sweetness perfectly, but apple cider vinegar works too. Toast your sesame seeds in a dry pan for 30 seconds—they’ll smell incredible and add crunch.
Cooked beans and rice keep 4-5 days in airtight containers. Portion into bento boxes for 5 days of lunches. Freeze portions for 3 months—thaw overnight in the fridge. The ginger and sesame oil can be prepped ahead and stored in the fridge for 1 week. For meal prep, cook a double batch of rice and store separately to maintain texture. The miso paste stays potent for 6 months refrigerated.
Why You'll Love This Recipe
- No-Fuss Simmer: I swear by this one—just soak the dried adzuki beans overnight, throw them in a pot with brown rice and water, then let them bubble away while I handle emails. The soy sauce and mirin caramelize right into the broth, so you’re basically getting a flavor upgrade for doing nothing.
- Umami Bomb: That combo of soy sauce and mirin? It’s like a tiny explosion of savory-sweet in every bite. The beans stay tender but hold their shape, and the rice soaks up all the richness—no weird mushy bits, just pure, satisfying texture.
- Lunchbox Hero: Between us, this is my go-to for meal prep. Cold or reheated, it’s still solid—pack it in bento boxes for work or school lunches, or serve it warm with a fried egg on top. Honestly, it’s the only rice dish my picky teenager won’t complain about.
- Budget Magic: A cup of dried beans and a bag of brown rice last me ages, and the pantry staples (soy, mirin) are cheap. I make this twice a month, and it’s always the dish that saves me when groceries run low—but somehow still feels special. (Yes, even on a Tuesday night.)
Step-by-step instructions for adzuki beans and brown rice
This method delivers perfectly balanced sweet-savory Japanese bento rice with tender adzuki beans.
Prepare the Adzuki Beans
Place the 1 cup dried adzuki beans in a medium bowl and cover with plenty of cold water. Soak overnight or at least 8 hours until they've doubled in size. Drain thoroughly before using—any remaining water will prevent proper cooking.
Transfer the soaked beans to a medium saucepan and add 3 cups of the 4 cups water. Bring to a boil over high heat, then reduce to medium-low and simmer uncovered for 45-60 minutes until the beans are tender but not mushy. You'll know they're ready when they easily crush between your fingers but still hold their shape. Skim off any foam that rises to the surface during cooking.
Cook the Brown Rice
While the beans cook, rinse the 1.5 cups brown rice under cold water in a fine-mesh strainer until the water runs clear. This removes excess starch that would make the rice gummy. Transfer the rice to a clean medium saucepan and add the remaining 1 cup water.
Bring to a boil over high heat, then immediately reduce to low heat and cover with a tight-fitting lid. Simmer for 40-45 minutes without lifting the lid—this steaming method creates perfectly fluffy, separate grains. The rice is done when all the liquid has been absorbed and the grains have a slight bite. If any liquid remains, continue cooking uncovered for another 5 minutes.
Create the Sweet-Savory Seasoning
In a small saucepan, combine the 2 tablespoons soy sauce, 1 tablespoon mirin, 1 tablespoon rice vinegar, 1 tablespoon sugar, and ½ teaspoon salt. Bring to a gentle simmer over medium-low heat and cook for 3-4 minutes until the sugar dissolves completely. Remove from heat and stir in the 1 tablespoon finely grated fresh ginger.
In a separate small bowl, mix together the 1 tablespoon white miso paste and 1 teaspoon sesame oil. This combination adds deep umami flavor and nutty richness to balance the sweetness. Keep both mixtures separate until ready to combine.
Combine and Finish
Transfer the cooked brown rice to a large mixing bowl. Gently fold in the cooked adzuki beans using a wooden spoon or rice paddle, being careful not to mash them. Add the warm soy-mirin mixture and the miso-sesame mixture, stirring thoroughly to distribute evenly.
For the final touch, drizzle with the remaining 1 teaspoon sesame oil and sprinkle with 1 teaspoon toasted sesame seeds. The sesame oil adds aromatic depth while the seeds provide texture contrast. Serve immediately while still warm, or let cool slightly before packing for bento boxes.
Pro Tips For Making Adzuki Beans And Brown Rice
- SOAK BEANS 4+ HOURS: I learned this the hard way—rushing the soak leaves adzuki beans tough and uneven. Use cold water overnight (or at least 4 hours) in a bowl with a pinch of salt, then drain and rinse. The longer they soak, the faster they cook, and the creamier the texture turns out.
- COOK RICE SEPARATELY: Brown rice needs more water and time than beans. Cook them in individual pots—beans in 1:3 bean-to-water ratio, rice in 1:2—and adjust seasoning separately. Mixing them mid-cook risks mushy rice or undercooked beans.
- STIR BEANS EARLY: After the initial boil, stir adzuki beans every 5 minutes for the first 20 minutes. This prevents them from sticking to the pot and ensures even cooking. (Yes, even if you’re impatient like me.)
- SAVE TIME WITH MIRIN: Add mirin after the beans soften but before they’re fully tender—it sweetens the sauce without overpowering. Skip the long simmer; just toss it in with the soy sauce for the last 5 minutes. (Your future self will thank you.)
Serving suggestions for leftovers
Bento Box Essentials
Pack this dish in a compartmentalized bento box for a visually stunning presentation. I use a four-section bento (like the Kinto Unko brand) to separate the adzuki-brown rice mix from sides. Add pickled daikon radish (thinly sliced with 1 tbsp rice vinegar + 1 tsp sugar) for tangy contrast—it brightens the sweet-savory profile. 🥢
Miso-Glazed Vegetables
Sauté 1 cup shredded cabbage and 1 carrot (julienned) in 1 tsp sesame oil until tender. Toss with 1 tbsp white miso paste and 1 tsp mirin, then broil for 3 minutes for caramelized edges. The umami glaze complements the beans beautifully. Serve alongside the rice for a complete meal.
Protein Boosters
For extra protein, add ½ cup marinated tofu cubes (tossed in 1 tbsp soy sauce + 1 tsp grated ginger) or soft-boiled eggs (peeled and halved). The tofu absorbs the bento's flavors when packed together, while eggs add richness. Both options keep the dish vegan-friendly or flexible.
Garnish Like a Pro
Elevate the dish with microgreens (like mizuna) for freshness and crispy shichimi togarashi (Japanese chili flakes) for heat. I also sprinkle 1 tsp furikake (a Japanese seasoning blend) over the rice just before serving—it adds a smoky, nutty crunch that ties everything together. 🌟
Beverage Pairings
Pair this bento with genmaicha green tea (toasted rice adds nutty notes) or yuzu soda (citrus cuts through the richness). For a non-alcoholic option, try matcha latte—the earthy bitterness balances the dish's sweetness. If you prefer alcohol, a dry sake (like Dassai Junmai) enhances the umami without overpowering.
Meal Prep Tips
Divide the adzuki-brown rice mix into airtight containers and store for 4-5 days. Reheat gently in the microwave with 1 tsp water to prevent drying. Pack sides separately to maintain crispness. For extra convenience, pre-portion pickled vegetables and miso-glazed veggies in small containers—just grab and go! ⏰
Nutrition facts
Frequently asked questions
Can I use canned adzuki beans instead of dried?
Yes, but with adjustments! For 1 cup dried, use 1.5 cups canned (drained and rinsed). Reduce cooking time by 20-30 minutes since canned beans are pre-cooked. Drain well to avoid excess liquid in your dish—this helps maintain the perfect texture when mixed with brown rice.
How do I make this recipe gluten-free?
Simple swaps make this dish completely gluten-free! Replace regular soy sauce with gluten-free tamari and use coconut aminos if needed. For mirin, choose a gluten-free version or blend 1 tbsp rice vinegar + 1 tsp sugar. Always check miso paste labels—some contain wheat. The rest of the ingredients are naturally gluten-free.
Why did my brown rice turn mushy?
Mushy rice usually means too much water or stirring too soon! Brown rice needs low heat and no stirring after boiling—just let it steam. Use 1.5 cups uncooked rice to 3 cups water (this recipe's ratio). If it's still too wet, spread it on a baking sheet and dry it in the oven at 200°F for 10 minutes.
Can I make this ahead for meal prep?
This dish actually tastes better the next day. Cook and combine everything, then store in airtight containers for 4-5 days. Reheat gently with 1 tsp water to restore moisture. For best texture, pack sides separately—pickled veggies stay crisp while the rice-bean mix reheats beautifully.
What's the best way to adjust the sweetness?
Start with the 1 tbsp sugar called for, then taste as you go. For more sweetness, add ½ tsp at a time—the beans will absorb it gradually. Too sweet? Balance with extra rice vinegar (1 tsp increments) or a pinch of salt to highlight the umami. The miso and soy sauce already provide depth, so adjust gradually!