
Main Courses
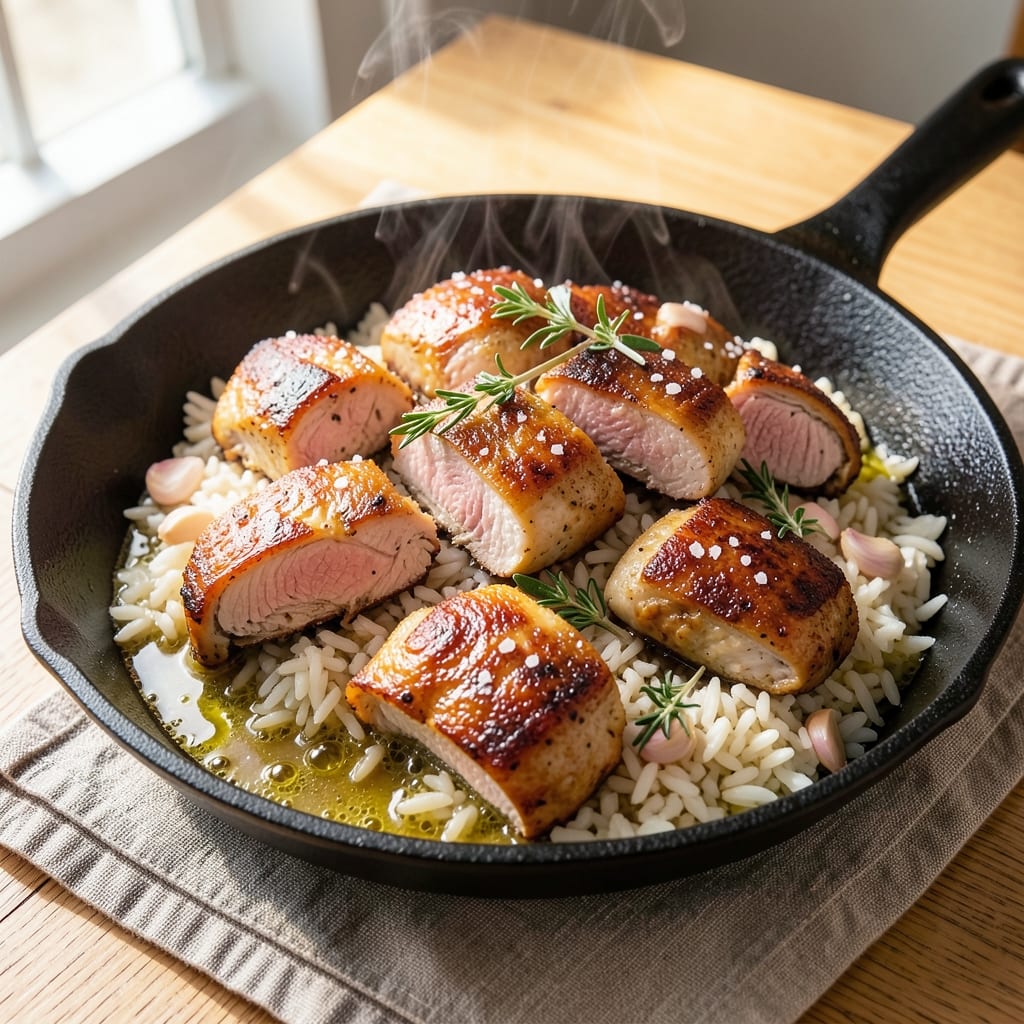
This amazing chicken and rice recipe delivers restaurant-quality comfort in a single pot, where golden crust meets tender chicken and fluffy rice in every bite. I perfected this technique after years of testing one-pot methods—no more dirtying multiple dishes, just one pan that transforms simple ingredients into a showstopper. The secret? A crispy, caramelized crust that forms on top while the rice and chicken cook below, creating layers of flavor with minimal effort.
What makes this recipe truly special is how it balances simplicity with bold flavor. You start with chicken thighs (their fat keeps the meat juicy) and long-grain white rice, simmered together in a rich broth infused with garlic, onions, and herbs. As it cooks, the liquid reduces, leaving behind a sauce that clings to every grain and bite of chicken. The golden crust? That’s where the magic happens—it’s crispy, slightly caramelized, and packed with flavor, making this dish feel like a celebratory meal even on a weeknight.
By the time you’re done, you’ll have a dish that’s hearty enough for a family dinner but easy enough for a solo night in. The chicken will be fall-off-the-bone tender, the rice perfectly fluffy, and that golden crust? It’s the kind of detail that makes people ask for seconds. Serve it with a simple side salad or steamed vegetables to round out the meal, or enjoy it as-is—this one-pot wonder is designed to shine on its own.
Here’s the best part: this recipe scales effortlessly. Double it for a crowd, halve it for leftovers, or keep it as-is for a satisfying solo meal. The technique is foolproof, and the results? Absolutely worth the effort. Let’s get cooking—your taste buds (and your cleanup routine) will thank you.
Ingredients for amazing chicken and rice
Golden crust, juicy chicken, and fragrant rice—this one-pot recipe does it all with simple ingredients.
| Ingredient | Amount | Notes |
|---|---|---|
| Boneless, Skinless Chicken Thighs 🍗 | 1 ½ lb | Cut into 1-inch pieces |
| Long-Grain White Rice 🍚 | 1 cup | Uncooked, jasmine or basmati preferred |
| Chicken Broth 💧 | 2 cups | Low-sodium preferred |
| Extra-Virgin Olive Oil 🫒 | 2 tbsp | For crispy rice crust |
| Garlic Cloves 🧄 | 4 cloves | Minced for aromatic base |
| Fresh Thyme Leaves 🌿 | ¼ cup | Dried works at 1/3 amount |
| Fresh Rosemary 🌿 | ¼ cup | Chopped, stems removed |
| Salt 🧂 | 1 ½ tsp | Kosher or sea salt |
| Black Pepper 🌶️ | ½ tsp | Freshly ground preferred |
| Fresh Parsley 🌿 | ¼ cup | Chopped for garnish |
| Lemon Juice 🍋 | 1 tbsp | Freshly squeezed |
| Butter 🧈 | 2 tbsp | Cold, for extra richness |
| Onion 🧅 | 1 whole | Medium, diced |
| Bay Leaf 🍃 | 1 whole | For depth of flavor |
The chicken thighs are key here—bone-in, skin-on if you can find them, but boneless works too. Trader Joe's or Costco usually have great deals on chicken thighs in bulk. Look for pieces with good marbling, not too lean. The rice? Jasmine or basmati gives that perfect texture, but any long-grain will do. Fresh herbs make all the difference—grab a bunch of thyme and rosemary from the grocery store's produce section, not the dried stuff in the spice aisle. And that butter? Use cold, unsalted butter for the crispy crust—don't skip this part, trust me.
No chicken thighs? Boneless, skinless chicken breasts work in a pinch, but they'll stay a little drier. Short on thyme? Dried thyme at one-third the amount gets you close. The onion can be swapped for 1/2 cup onion powder if you're in a rush, but fresh is better. For extra richness, add 1 tbsp of heavy cream at the end. The bay leaf is non-negotiable—it adds that restaurant-quality depth. And if you're making this ahead, cook the rice separately and crisp it up in the oven with a little extra oil before mixing with the chicken.
This reheats like a dream—just add a splash of broth to keep everything moist. Keeps for 4-5 days in the fridge, freezes for 3 months. Double the recipe if you're feeding a crowd—it's that good. The golden crust gets even better the next day, so make extra. Store leftovers in airtight containers with a paper towel on top to keep the crust crispy. And if you've got any extra butter? Drizzle it on top before serving—game changer.
Why You'll Love This Recipe
- One-Pot Magic: I swear by this recipe—just toss everything into one pot, walk away, and come back to golden-brown chicken and fluffy rice. The chicken thighs stay juicy while the rice soaks up all that savory broth, and honestly? No extra bowls to wash.
- Garlic Bomb Flavor: That first hit of olive oil and minced garlic sizzling in the pan is my favorite part. The chicken ends up tender with a crispy edge, and the rice? It’s got this deep, umami richness from the broth that makes every bite feel like a hug.
- Meal Prep MVP: Between us, this is my go-to for busy weeks. Cook a big batch on Sunday, and I’ve got lunch or dinner covered for days—just reheat and enjoy. The rice stays separate enough to microwave without turning to mush, and the chicken reheats like it’s fresh.
- Budget-Friendly Powerhouse: Chicken thighs are cheaper than breasts, and a bag of rice lasts forever. I make this for my college-age kids, my partner after workouts, and even for guests without breaking the bank. Plus, the leftovers taste just as good the next day—if there are any left.
Step-by-step instructions for one-pot golden crust chicken and rice
This method delivers restaurant-quality chicken and rice with a crispy golden crust—all in one pot.
Sear the Chicken for Maximum Flavor
Heat a large, heavy-bottomed pot (like Dutch oven) over medium-high heat. Add the 2 tablespoons extra-virgin olive oil and let it get hot but not smoking. Working in batches if needed, add the 1.5 lb boneless, skinless chicken thighs cut into 1-inch pieces and cook for 5-6 minutes per side until golden brown and cooked through.
Here's the thing—don't crowd the pan. You want those chicken pieces to develop a nice crust. If they release easily when you try to flip them, they're ready. Transfer the seared chicken to a plate and set aside. We'll add it back later when everything else is cooking.
Build the Aromatic Base
In the same pot, reduce the heat to medium and add the 1 whole diced onion. Cook for 4-5 minutes until softened and beginning to caramelize. Add the 4 cloves minced garlic and cook for an additional 30 seconds until fragrant—don't let it burn, or you'll get bitter flavors.
Next, stir in the 0.25 cup chopped fresh rosemary, 0.25 cup fresh thyme leaves, and 1 whole bay leaf. Let these herbs toast in the pot for 1 minute to release their essential oils. This step is what gives your dish that professional depth of flavor. The herbs will mellow as they cook, but that initial burst of aroma is crucial.
Toast the Rice for Crispy Texture
Add the 1 cup long-grain white rice to the pot and stir to coat it evenly with the aromatic oil and herbs. Cook for 2-3 minutes until the rice grains become translucent at the edges. This toasting step is what creates that beautiful golden crust we're after.
Here's where it gets fun—carefully pour in the 2 cups chicken broth and the 2 tablespoons cold butter. The butter will melt and create steam, which helps build that crispy crust. Stir once to distribute everything evenly, then don't touch it again. The rice will absorb the liquid gradually as it cooks.
Simmer to Perfect Doneness
Return the seared chicken to the pot, spreading it evenly over the rice. Bring the mixture to a gentle simmer over low heat. Cover with a tight-fitting lid and cook for 18-20 minutes. You want the rice to absorb all the liquid and become tender, but not mushy.
After 18 minutes, check the rice by tasting a grain—it should be tender but still have a slight bite. If it's not quite done, cook for another 2-3 minutes uncovered. The key is to let the rice cook through without drying out. The chicken should be fork-tender and easily flaked apart.
Finish with Bright Herbs and Lemon
Once the rice is perfectly cooked, remove the pot from heat. Stir in the 1.5 teaspoons salt, 0.5 teaspoon black pepper, 1 tablespoon fresh lemon juice, and 0.25 cup chopped fresh parsley. Let the dish sit covered for 5 minutes to let the flavors meld together.
For that golden crust, here's a pro tip: Before serving, use a spoon to press down gently on the rice surface. This helps create that crispy top layer that everyone will love. Serve immediately, garnished with additional parsley if desired. The one-pot method keeps everything hot and delicious right from the start.
Pro Tips For Making Amazing Chicken And Rice
- SEAR THIGHS HOT AND FAST: Chicken thighs need a good crust, but don’t let them steam in their juices. Heat your olive oil until it shimmers (350°F+), then work in batches—overcrowding drops the temp and ruins the sear. Two minutes per side, golden-brown spots only. Yes, even if they’re not perfectly even—just get that color.
- MINCE GARLIC LIKE YOU MEAN IT: Whole garlic cloves? No. Smash those cloves flat with the side of your knife, then finely chop—think paste, not confetti. Raw garlic burns easily, and burnt garlic ruins everything. If you’re lazy, use ½ teaspoon of garlic powder after cooking, but fresh is worth the extra 30 seconds.
- TOAST THE RICE FIRST: Skip the "parboil" step—dry-toast your rice in olive oil over medium heat for 2–3 minutes until it smells nutty. This builds flavor and prevents mushy grains later. Stir constantly, or it’ll stick like glue. I learned this the hard way when my rice turned into a sad, gummy puddle.
- SIMMER, DON’T BOIL: Once the broth comes to a boil, drop the heat to a gentle simmer—tiny bubbles, not a rolling frenzy. Too much heat turns rice gluey and broth watery. Cover the pot and let it cook undisturbed for 15 minutes. No peeking, no stirring—just patience. The rice will absorb the broth perfectly.
Serving suggestions for this amazing chicken and rice
Crispy Crust Presentation
That golden crust isn't just for show—it's the star of the dish! Before serving, press down gently on the rice surface with a spoon to create a crispy top layer. For extra drama, run a sharp knife around the edges to define the crust before plating. I like to serve this in the same Dutch oven it was cooked in, letting guests see that perfect crust right from the start. 🌟
For an elevated touch, transfer the dish to a serving platter and garnish with extra lemon wedges and fresh parsley. The contrast of the bright green herbs against the golden crust makes it look like a restaurant-worthy meal. If you're feeling fancy, add a drizzle of truffle oil—just ½ teaspoon—for an extra layer of sophistication.
Perfect Side Pairings
A simple mixed greens salad with a light vinaigrette cuts through the richness of the chicken and rice. Toss 4 cups baby spinach with 2 tablespoons olive oil, 1 tablespoon red wine vinegar, and ½ teaspoon Dijon mustard. Add sliced cucumbers and cherry tomatoes for crunch. This keeps the meal balanced and refreshing. 🥗
For a heartier option, serve with roasted Brussels sprouts tossed in 1 tablespoon balsamic glaze and ½ teaspoon smoked paprika. The caramelized edges of the sprouts complement the crispy rice crust beautifully. If you're feeding a crowd, a simple garlic bread made with a baguette and 2 tablespoons softened butter mixed with 1 teaspoon garlic powder is always a hit.
Sauce Elevations
Drizzle each serving with 1 teaspoon of lemon-honey sauce made by mixing 2 tablespoons honey with 1 tablespoon fresh lemon juice. This brightens the dish and adds a touch of sweetness that balances the savory flavors. For extra richness, spoon 2 tablespoons of creamy garlic aioli over the top—just mix ½ cup mayonnaise with 1 minced garlic clove and ½ teaspoon lemon juice. 🍋
If you love heat, serve with a side of spicy chimichurri. Blend ½ cup fresh parsley, 2 tablespoons red wine vinegar, 1 teaspoon red pepper flakes, 2 minced garlic cloves, and 2 tablespoons olive oil until smooth. The herby, spicy contrast is incredible with the tender chicken and fluffy rice.
Make-Ahead Serving
This dish reheats beautifully, making it perfect for meal prep. Store leftovers in an airtight container and reheat on the stovetop over medium-low heat for 5-7 minutes, adding 2 tablespoons of broth or water to keep it moist. The golden crust will soften slightly but still taste amazing. For a crispy crust on leftovers, transfer the dish to a baking dish, cover with foil, and bake at 375°F for 10 minutes before serving. ⏰
When serving leftovers, garnish with extra herbs and a sprinkle of freshly cracked black pepper. The flavors actually deepen overnight, so it tastes even better the next day. If you're planning ahead, cook the rice separately and store it in the fridge. When ready to serve, crisp it up in a skillet with a little extra butter and olive oil before mixing with the chicken and reheating the sauce.
Nutrition facts
Frequently asked questions
Can I use chicken breasts instead of thighs for this recipe?
You can, but thighs are ideal because their fat keeps the meat juicy during long cooking. If using breasts, cut them into ½-inch thick pieces and cook them for 3-4 minutes less per side to avoid overcooking. For extra moisture, add 1 tablespoon of chicken broth when returning the chicken to the pot.
How do I get that perfect golden crust every time?
The secret is toasting the rice first and using cold butter. After adding the broth, stir once, then let it cook undisturbed. For extra crispiness, press down gently on the rice surface with a spoon before serving. If the crust isn't forming, try cooking the rice 1-2 minutes uncovered at the end.
What if my rice turns out mushy?
Mushy rice usually means too much liquid or too long cooking time. For this recipe, the rice should absorb all the broth by the end. If it's still too wet, uncover the pot and cook for 2-3 more minutes on low heat. For next time, use 1:1.5 ratio of rice to broth (1 cup rice to 1.5 cups broth) to prevent sogginess.
Can I make this dish ahead of time?
Cook the rice separately and store it in the fridge. Reheat the chicken and sauce in a skillet, then mix with the cold rice. For the golden crust, toast the rice in a dry skillet with 1 tablespoon butter and 1 tablespoon olive oil for 3-4 minutes before combining. The flavors actually improve overnight!
What's the best way to reheat leftovers?
Reheat on the stovetop over medium-low heat for 5-7 minutes, adding 2 tablespoons of broth or water to keep it moist. For a crispy crust, transfer to a baking dish, cover with foil, and bake at 375°F for 10 minutes before serving. Store leftovers in an airtight container for up to 4-5 days.