
Main Courses
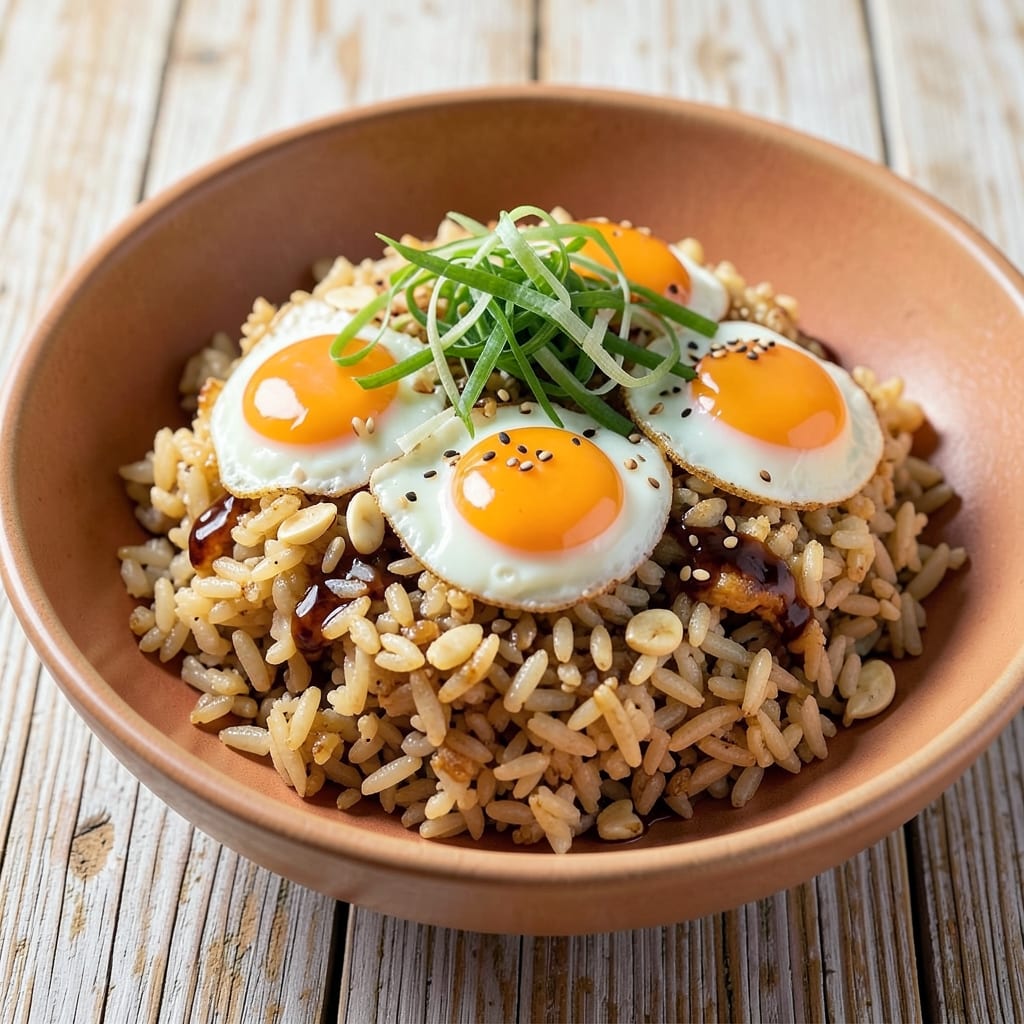
This Filipino-style anda fried rice delivers the perfect balance of golden, crispy grains and rich, creamy eggs—just like your favorite carinderia dish. 💛 The secret lies in high-heat frying and a well-seasoned egg mixture that coats every bite, transforming simple ingredients into a restaurant-worthy meal.
What sets this recipe apart is the wok hei technique, where the rice develops a smoky aroma and crispy edges from quick, high-heat cooking. You’ll start by frying the rice until it’s fragrant and slightly caramelized, then stir in the egg mixture for that signature creamy, eggy richness. The result? A dish that’s foolproof for beginners but packed with depth for seasoned cooks.
By the time you’re done, you’ll have a fragrant, golden-brown plate of fried rice with tender eggs and savory seasonings. The texture is crisp on the outside, soft on the inside, and every bite carries that unmistakable anda flavor. It’s the kind of meal that feels indulgent but comes together in under 30 minutes—perfect for weeknight dinners or meal prep.
Customize it with shrimp, chicken, or vegetables for a pescatarian or veggie-friendly twist. Let’s get cooking!
Ingredients for anda fried rice
Four cups of day-old rice, six eggs, and a handful of pantry staples transform into restaurant-quality Filipino fried rice.
| Ingredient | Amount | Notes |
|---|---|---|
| Day-Old Jasmine Rice 🍚 | 4 cups | Cold, uncooked, day-old preferred |
| Large Eggs 🥚 | 6 whole | Fresh, room temperature |
| Vegetable Oil 🫒 | ½ cup | High smoke point, like avocado oil |
| Green Onions 🧅 | ½ cup | Thinly sliced, white and green parts |
| Garlic Cloves 🧄 | 6 cloves | Minced, fresh preferred |
| Soy Sauce 🥢 | 2 tbsp | Light or regular, not low-sodium |
| Oyster Sauce 🍜 | 2 tbsp | High-quality, like Lee Kum Kee |
| Sesame Oil 🫒 | 1 tbsp | Toasted, for aroma |
| Salt 🧂 | 1 tsp | Diamond Crystal preferred |
| Black Pepper 🌶️ | ¼ tsp | Freshly ground |
| Ground White Pepper 🌶️ | ¼ tsp | For authentic Filipino flavor |
| Sugar 🍚 | 1 tsp | White granulated |
| Vegetable or Chicken Broth 💧 | ½ cup | Low-sodium preferred |
| Optional Protein Add-Ins 🍤🍗 | 1 cup | Chopped shrimp, chicken, or veggies |
The rice is non-negotiable—day-old, cold grains fry up crispier and more aromatic. Jasmine rice is ideal, but any long-grain works. Trader Joe's or Asian markets carry the best quality for this dish. Fresh eggs make all the difference here; room temperature eggs scramble more evenly. For the oil, avocado or grapeseed handles the high heat without burning. If you're prepping ahead, cook the rice the night before and store it uncovered in the fridge to dry out slightly—this helps achieve that perfect crunch.
No oyster sauce? Hoisin sauce or extra soy sauce works in a pinch, but the umami depth is worth tracking down. The sesame oil is purely for aroma—add it last, or you'll overpower the dish. Fresh garlic and green onions are best, but frozen chopped onions work if you're in a rush. For the protein add-ins, shrimp cooks fastest, followed by chicken, then veggies. Lee Kum Kee oyster sauce is the gold standard, but any reputable brand with no additives will do. The sugar might seem odd, but it balances the savory flavors beautifully—trust me on this.
This dish reheats like a dream—better the next day once flavors meld. Store leftovers in an airtight container for 4-5 days in the fridge or freeze for 3 months. I always double the recipe because it disappears fast. For meal prep, portion into containers with a sprinkle of green onions on top—they stay fresh for 5 days this way. The crispy rice loses its texture when reheated, so enjoy it fresh if possible, or microwave for 30 seconds with a splash of water to revive the crunch.
Why You'll Love This Recipe
- I’ll be real: this recipe costs next to nothing. Day-old rice? Eggs? Oil? Green onions? You’re using what’s already there. It’s my secret weapon for nights when I’m too tired to order takeout but still want something solid.
- No Chopping Chaos: I swear by this recipe because the prep is ridiculously simple—just crack eggs, mince garlic, and slice green onions. That’s it. No dicing onions, no julienning carrots, just the essentials you can grab while talking to someone.
- Garlic Butter Magic: Honestly, the star here is that crispy fried egg yolk mixed into the rice with garlic sizzling in the oil. That first bite—warm, garlicky, with that runny yolk—is what makes this dish dangerously addictive. No fancy sauces needed.
- Lunchbox Hero: Between us, this is my go-to for packing lunches. Toss in some leftover chicken or veggies, and it’s a full meal that stays fresh for days. My kids actually eat it cold for school—proof it’s a winner.
Step-by-step instructions for Filipino-style anda fried rice
Perfectly golden, eggy, and packed with umami—this is how you make authentic anda fried rice.
🍳 Step 1: Scramble the Eggs to Cloudy Perfection
Heat a large wok or skillet over medium-high heat with 1 tablespoon of the vegetable oil. Crack all 6 whole large eggs into a bowl, add 0.25 teaspoon black pepper, 0.25 teaspoon ground white pepper, and 1 teaspoon sugar, then whisk vigorously until fully combined.
Pour the egg mixture into the hot wok and let it sit undisturbed for 10-15 seconds—you'll see the edges start to set. Using a spatula, gently push the eggs from one side to the other, creating soft, cloudy curds. Keep moving them until the eggs are just set but still slightly runny in the center. Remove and set aside—these eggs are the soul of your fried rice.
👨🍳 Step 2: Stir-Fry Aromatics Until Fragrant
Increase the heat to high and add the remaining 0.33 cup vegetable oil (about ⅔ of the total). Toss in the 6 cloves minced garlic and 0.5 cup thinly sliced green onions, stirring constantly for 30-45 seconds until the garlic turns golden and the onions soften slightly. You're aiming for aroma, not browning—watch closely.
Here's the thing—garlic burns fast. If it starts to darken, immediately reduce heat to medium and keep stirring. The moment it releases its fragrance is when you add the 4 cups day-old jasmine rice, breaking up any clumps as you go. Spread the rice evenly in the wok for even cooking.
🔥 Step 3: Toast the Rice Until Golden Crunch Develops
Stir-fry the rice for 3-4 minutes until it turns a beautiful golden brown color. This is where the magic happens—the rice should develop a crispy texture while staying tender inside. If it starts sticking, add 1 tablespoon of the vegetable or chicken broth to loosen it.
I press down gently on the rice with the spatula during the first minute—this prevents it from curling and ensures even contact with the pan. You'll hear a satisfying sizzle as the rice toasts. Once it's golden and fragrant, it's time to build the sauce.
🥘 Step 4: Build the Sauce with Umami Bombs
Pour in the 2 tablespoons soy sauce, 2 tablespoons oyster sauce, and remaining 0.17 cup vegetable or chicken broth (about ⅓ of the total). Stir everything together for 1-2 minutes until the rice absorbs the liquid and the sauce coats the grains evenly. The rice should look glossy and smell deeply savory.
Now add the 1 tablespoon toasted sesame oil and the 1 teaspoon salt. Toss gently but thoroughly—this is where the flavors meld. If you're using 1 cup optional protein add-ins (like shrimp or chicken), add them now and stir for another 1-2 minutes until heated through.
🍽️ Step 5: Finish with Crispy Eggs and Garnish
Return the scrambled eggs to the wok and toss everything together for 30 seconds to distribute the eggs evenly. Taste and adjust seasoning—you might need a little more soy sauce or salt depending on your protein. The final dish should be rich, slightly sweet, and packed with layers of flavor.
Garnish with the remaining 0.17 cup green onions (about ⅓ of the total) and serve immediately. The rice should be hot, the eggs creamy, and every bite should deliver that perfect balance of crispy, chewy, and tender textures. And there you have it—authentic Filipino anda fried rice that tastes like home.
Pro Tips For Making Anda Fried Rice
- CHILL THE RICE FIRST: I learned this the hard way—straight-from-the-fridge rice is too cold and will steam instead of fry. Spread your day-old rice on a tray and pop it in the freezer for 10 minutes. The cold shock prevents mushiness when it hits the pan, and the grains stay separate. (Yes, even if you're impatient like me.)
- SCRAMBLE EGGS IN TWO BATCHES: One big scrambled pile of egg? That’s how you end up with rubbery bits. Push half the eggs to one side of the pan, scramble them just until set, then repeat. The heat stays consistent, and the eggs stay creamy—not dry or overcooked. This isn’t the prettiest method, but it’s the tastiest.
- MINCE GARLIC FINE AND TOAST IT: Skip the rough chop—your fried rice will taste flat. Pulse garlic in a food processor until it’s almost a paste, then toss it into the hot oil. Let it sizzle for 30 seconds until fragrant and just starting to brown. That’s the thing that makes the difference between "meh" and "wow."
- USE HIGH HEAT FOR THE RICE: Low heat = sad, sticky rice. Crank the burner to medium-high and let the oil shimmer before adding the rice. Stir constantly for the first 30 seconds—this sears the grains and locks in flavor. If you’re worried about burning, you’re doing it wrong. (Your future self will thank you.)
Perfect pairings for these flavors
Classic Filipino Sides
Serve your anda fried rice with atchara—pickled green papaya with shrimp paste—for a tangy, crunchy contrast that cuts through the richness. I love pairing it with lumpia (Filipino spring rolls) for a crispy, savory bite. Both sides are staples in Filipino carinderias and elevate the meal instantly. 🥗
Crispy Protein Add-Ons
For extra texture, add garlic fried shrimp or crispy pork belly bits to your fried rice. I recommend tossing peeled shrimp in 1 tbsp soy sauce, 1 tsp sugar, and ½ tsp black pepper, then pan-frying until golden. The shrimp cooks in just 3-4 minutes and adds a delightful crunch. 🍤
Sweet & Tangy Dipping Sauces
Create a quick sweet chili dip by mixing 2 tbsp ketchup, 1 tbsp soy sauce, 1 tbsp rice vinegar, and 1 tsp sugar. This balances the richness of the fried rice beautifully. For a spicy kick, add ½ tsp sriracha or calamansi juice (Filipino lime) to brighten the flavors. 🍶
Creamy Coconut Milk Pairing
For a refreshing contrast, serve a side of gulaman (agar-agar) or coconut milk-based ginataang gulay (vegetable stew). The cool, creamy texture of the coconut milk complements the warm, savory fried rice perfectly. I often make a quick version with 1 can coconut milk, 1 cup mixed veggies, and a pinch of salt—simmer for 10 minutes for a light, flavorful side. 🥥
Filipino Beverage Pairings
Sip on calamansi juice (Filipino limeade) or tsokolate (Filipino hot chocolate) to cleanse your palate between bites. For a non-alcoholic option, try barako root tea—its earthy notes pair wonderfully with the dish. If you prefer beer, a light Filipino lager like San Miguel keeps the meal refreshing. 🍺
Garnish for Extra Flavor
Top your fried rice with crispy fried shallots or toasted sesame seeds for added crunch and aroma. I also love sprinkling crumbled leftover crispy pork (lechon kawali) on top for a smoky, savory finish. These garnishes add layers of texture and depth to every bite. 🌟
Nutrition facts
Frequently asked questions
Why does the recipe call for day-old rice?
Day-old rice is crucial for achieving that perfect crispy texture. Freshly cooked rice contains too much moisture, which makes it steam instead of fry properly. The starches dry out slightly overnight, creating individual grains that develop a satisfying crunch when stir-fried. Plus, the flavors deepen after resting!
Can I make anda fried rice without a wok?
A heavy-bottomed skillet or large non-stick frying pan works perfectly. The key is maintaining high heat for quick cooking. If your pan isn't wide enough, work in batches to prevent overcrowding. Just be ready to stir constantly to achieve that signature wok hei aroma.
What's the secret to perfectly scrambled eggs for fried rice?
The magic happens in two steps: first, let the eggs sit undisturbed for 10-15 seconds to set the edges, then gently push them into soft curds. The sugar and white pepper in the egg mixture create that signature cloudy texture while keeping the eggs rich and flavorful. Never overcook them—they should be just set but still slightly runny in the center.
How do I prevent my fried rice from getting mushy?
Mushy rice happens when it absorbs too much liquid. Use day-old rice, cook it on high heat, and add broth gradually—only when needed to prevent sticking. Also, avoid overmixing after adding the sauce. The grains should remain distinct and slightly crispy around the edges. Remember: high heat is your friend for maintaining texture!
Can I make anda fried rice with other types of rice?
While jasmine rice is traditional, you can use basmati or long-grain white rice. Short-grain or sticky rice won't work as well—they'll turn mushy. For best results, use any long-grain rice that's at least 12 hours old (preferably day-old). The key is dry, separate grains that can develop that signature crispy crust.