
Desserts
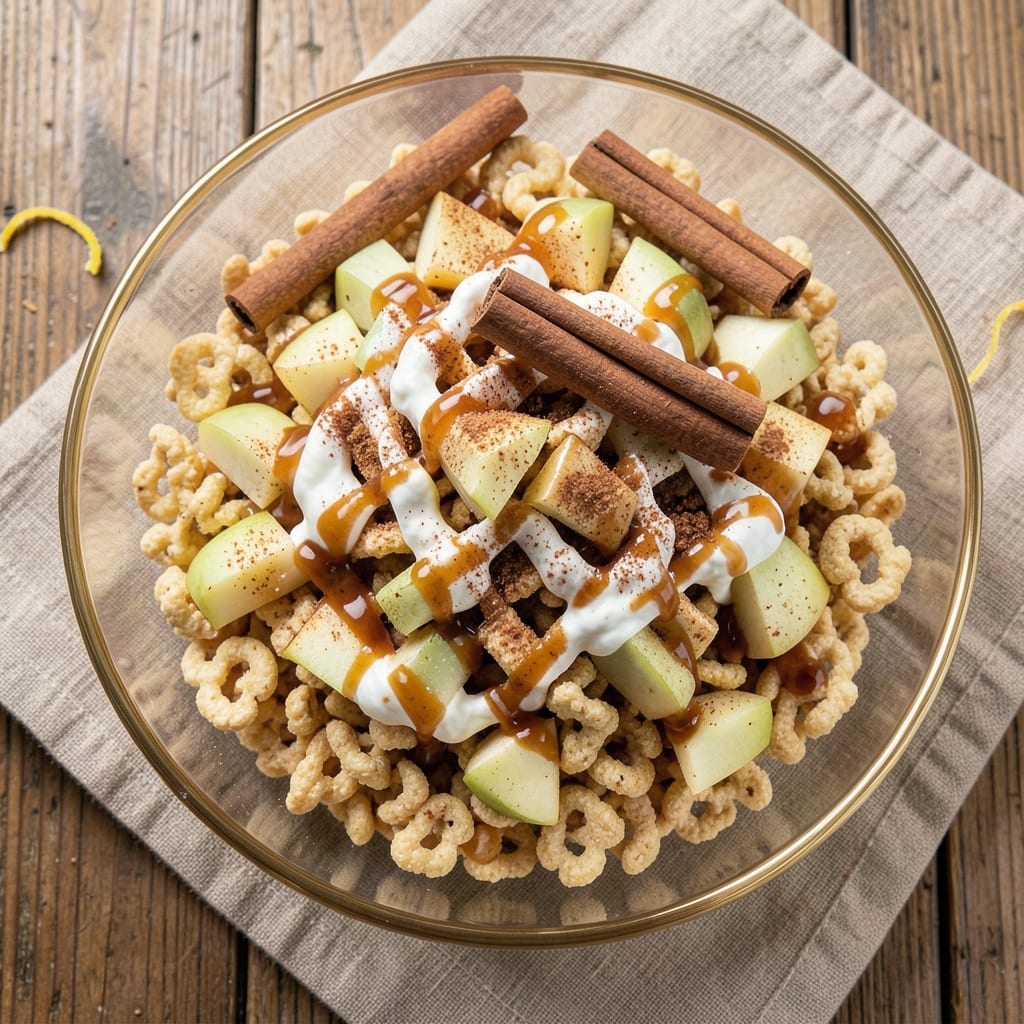
This apple Rice Krispies recipe transforms a classic snack into a fall-inspired dessert with caramelized apple chunks and warm cinnamon notes. The secret lies in cooking down apples with butter and sugar until they're tender and glossy, then mixing them into melted marshmallow and cereal for a chewy, crunchy treat. It's the perfect balance of nostalgia and seasonal flavor—ideal for holiday gatherings or a cozy afternoon snack.
What makes this recipe special is the caramelized apple step, which adds depth and moisture to the treats. You'll start by simmering apples with butter and sugar until they're soft and fragrant, then fold them into the marshmallow mixture before adding the cereal. The result is a bar that's crispy on the outside, gooey in the middle, and packed with apple flavor in every bite. It's foolproof, requires no baking, and comes together in about 20 minutes.
The finished treats have a golden, glossy sheen from the caramelized apples and a satisfying crunch from the Rice Krispies. They hold together beautifully, making them easy to cut into squares or triangles for serving. This recipe also adapts well to dietary needs—simply swap the marshmallows for vegan alternatives or use gluten-free cereal for a inclusive version.
Perfect for sharing at parties, packing in lunches, or enjoying with a cup of coffee. The warm apple-cinnamon aroma alone makes your kitchen feel like a bakery. Let's get started!
Ingredients for apple rice krispies
Twelve simple ingredients transform into chewy, golden apple Rice Krispies treats with caramelized depth.
| Ingredient | Amount | Notes |
|---|---|---|
| Granny Smith Apples 🍎 | 4 medium | Peeled, cored, diced small |
| Unsalted Butter 🧈 | ½ cup | Cut into small cubes |
| Granulated Sugar 🍚 | 1 ½ cups | White or brown preferred |
| Cinnamon 🌿 | 1 tsp | Ground, for apple mixture |
| Vanilla Extract 🥛 | ½ tsp | Pure, for flavor depth |
| Marshmallow Fluff 🍬 | 14 oz | Standard or vegan substitute |
| Rice Krispies Cereal 🍚 | 6 cups | Original or gluten-free |
| Light Corn Syrup 🍯 | 1 tbsp | For glossy finish (optional) |
| Salt 🧂 | ¼ tsp | Fine sea salt preferred |
| Lemon Juice 🍋 | 1 tbsp | Fresh, for brightness |
| Ground Cinnamon 🌿 | ½ tsp | For dusting top layer |
| Powdered Sugar 🍚 | 2 tbsp | For final dusting |
The apples are the heart of this recipe—Granny Smiths add tartness that balances the sweetness, but any crisp apple works. Peeled and diced small, they caramelize beautifully. For the best flavor, use organic apples if possible, or at least wash them well. The butter should be cold when you start, but it'll melt into the apples as they cook. If you're short on time, pre-cut apples from the produce section save steps. Just make sure they're uniformly diced so they cook evenly.
No marshmallow fluff? Mini marshmallows melted with 1 tbsp corn syrup work in a pinch, though the texture won't be identical. The corn syrup in this recipe isn't just for sweetness—it creates that signature glossy sheen. Substitute agave or maple syrup if needed, but reduce by 1 tsp since they're less concentrated. For a gluten-free version, swap the Rice Krispies for gluten-free puffed rice cereal. The cinnamon is non-negotiable—it's what ties the apple flavor together. If you're feeling fancy, add a pinch of nutmeg to the apple mixture for extra warmth.
These treats keep beautifully—covered at room temperature for 3 days or fridge for 1 week. For longer storage, wrap tightly in plastic and freeze for up to 3 months. I like to portion them into individual squares before freezing so I can grab one whenever I want a sweet treat. The caramelized apples soften slightly over time, so they're even better the next day. If they lose their crispness, just pop them in the microwave for 10 seconds to refresh.
Why You'll Love This Recipe
- Five-Ingredient Magic: I swear by this list—just apples, butter, sugar, cinnamon, and vanilla. That’s it. No fancy equipment, no stress. Peel and slice the Granny Smiths (toss the core, because yes), melt butter in a pan, and let the sugar caramelize until it’s sticky-sweet. Honestly, it’s the kind of recipe that makes me feel like I’ve earned dessert.
- Crunchy-Caramel Bliss: The moment the Rice Krispies hit that buttery-apple sauce? Chef’s kiss. The Granny Smiths add that bright, tangy bite that cuts through the sweetness, while the cinnamon and vanilla make every bite taste like autumn in a bowl. Between us, I’ve made this for breakfast, snacks, and even a quick dessert—it’s that good.
- Weeknight & Holiday Hero: Need something fast for a school night? Done. Hosting a potluck? Bring this—it’s always a hit. I’ve even packed it in jars for my kid’s lunchbox (yes, with a spoon). The apples hold up surprisingly well, and the cinnamon keeps it from getting stale too fast. Plus, it’s way cheaper than buying pre-made treats.
- Leftovers? More Like Leftovers: Make a big batch—it reheats like a dream. Pop it in the microwave for 30 seconds, and it’s just as good as fresh. I’ll be real: I’ve had this for breakfast three mornings in a row, and no one’s complained. The butter keeps it rich, so it doesn’t dry out, and the sugar? Well, that’s just insurance against boredom.
Step-by-step instructions for apple Rice Krispies treats
Here's how to transform fresh apple chunks into a caramelized centerpiece for these nostalgic treats.
Cook the Apple Filling to Perfection
In a medium saucepan, melt the 0.5 cup unsalted butter over medium heat. Once melted, add the 4 medium Granny Smith Apples (previously peeled, cored, and diced small) and stir to coat them in the butter. This ensures even cooking and prevents sticking.
Add the 1.5 cups granulated sugar, 1 tsp cinnamon, 0.25 tsp salt, and 1 tbsp lemon juice to the saucepan. Stir well to combine all ingredients. Bring the mixture to a gentle boil, then reduce heat to medium-low and let it simmer for 15-20 minutes, stirring occasionally. You're looking for the apples to soften and the mixture to thicken into a caramelized consistency—it should coat the back of a spoon and have a rich, fragrant aroma. If it thickens too quickly, add 1-2 tablespoons of water to keep it smooth.
Once the apples are tender and the mixture has thickened, remove the pan from heat and stir in the 0.5 tsp vanilla extract. This step adds depth of flavor and balances the tartness of the apples. Let the mixture cool slightly for 5 minutes before proceeding—this prevents the marshmallow fluff from melting too quickly when combined.
Combine with Marshmallow Fluff
In a large mixing bowl, combine the cooled apple mixture with the 14 oz marshmallow fluff. Use a spatula to fold everything together gently until fully incorporated. The marshmallow fluff should create a smooth, glossy base that coats the apple pieces evenly. If the mixture seems too thick, add 1 tbsp light corn syrup to help it bind better and achieve that classic Rice Krispies Treat shine.
Here's the thing—don't rush this step. The marshmallow fluff needs to fully melt and blend with the apple mixture to create a cohesive filling. If you notice any unmelted fluff, warm the mixture briefly over a double boiler (or in short bursts in the microwave) until it's completely smooth. Once fully combined, set the bowl aside for 5 minutes to let the mixture cool slightly. This prevents the cereal from getting soggy when added.
Assemble and Press the Treats
Line an 8x8-inch baking dish with parchment paper, leaving an overhang on the sides for easy removal. Pour the apple-marshmallow mixture into the prepared dish and spread it evenly into a ¼-inch thick layer. This thickness ensures the treats bake evenly and hold their shape when cut.
Next, sprinkle the 6 cups Rice Krispies Cereal evenly over the marshmallow mixture. Press down gently but firmly with a spatula or the back of a spoon to ensure the cereal sticks to the filling. The goal is to create a uniform layer where every bite has that perfect crunch. If the cereal doesn't stick well, lightly spray the top with a bit of water or corn syrup to help it adhere.
Chill and Prepare for Serving
Cover the baking dish tightly with plastic wrap and refrigerate for at least 2 hours, or until the treats are completely firm. This chilling step is critical—it allows the marshmallow to set and the cereal to crisp up, giving you that classic Rice Krispies Treat texture. If you're short on time, you can speed this up by placing the dish in the freezer for 30-45 minutes, but the refrigerator method yields the best results.
Once chilled, remove the treats from the dish by lifting the parchment paper. Using a sharp knife, cut the treats into 12 equal squares (about 2x2 inches each). Dust the top of each square generously with the 0.5 tsp ground cinnamon and 2 tbsp powdered sugar for a finishing touch. Serve immediately or store in an airtight container at room temperature for up to 5 days. The powdered sugar and cinnamon not only add flavor but also help preserve the treats' freshness.
Optional Glaze for Extra Shine
For an extra touch of elegance, you can drizzle a simple glaze over the top of the treats before serving. In a small bowl, mix ½ cup powdered sugar with 1-2 teaspoons of milk or lemon juice until smooth. Drizzle this glaze over the treats just before serving—it adds a glossy finish and a hint of sweetness that complements the caramelized apple flavor.
These treats are best enjoyed at room temperature, where the contrast between the crispy cereal, creamy marshmallow, and tender apple filling shines. The caramelized apple adds a sophisticated twist to the classic Rice Krispies Treat, making it perfect for fall gatherings or as a nostalgic snack any time of year.
Pro Tips For Making Apple Rice Krispies
- Peel Apples Thin: Granny Smiths have thick skin—don’t strip away too much or the texture turns mushy. Use a sharp peeler and keep the slices about ¼-inch thick, or they’ll fall apart when simmering. ---
- Brown the Butter First: Skip the plain melted butter—browning it first adds depth. Let it foam and turn golden (about 3-4 minutes on medium heat), then cool slightly before mixing into the apples. The nutty flavor cuts through the sweetness. ---
- Simmer Apples Low: High heat turns apples to mush. Keep them at a gentle bubble (just enough to release juices) for 10-12 minutes. If they’re too watery, uncover and reduce heat—you want thick, glossy sauce, not soup. ---
- Toast Rice Krispies: Cold cereal tastes bland. Spread the cereal in a single layer on a baking sheet and toast at 300°F for 5-7 minutes, stirring once. The light crispiness balances the apples’ tang better than raw cereal ever will.
Common mistakes when making perfect results
Overcooking Apples
One common mistake is letting the apple mixture cook too long, turning it into a dry, grainy paste instead of a glossy caramel. I’ve seen this happen when people walk away from the stove and forget to stir occasionally. The apples should soften but still hold their shape slightly—think of them like tender apple butter. If your mixture looks like it’s turning into jam, you’ve gone too far. 🍎
Skipping the Cooling Step
Rushing the 5-minute cooling of the apple mixture before mixing with marshmallow fluff is a recipe for disaster. Hot apples will melt the marshmallow too quickly, creating a soupy mess that won’t hold together. I learned this the hard way—my first attempt ended up as a sticky puddle! Let the mixture cool just enough to handle before combining.
Uneven Cereal Distribution
Sprinkling the Rice Krispies too quickly or unevenly leads to lumpy treats with soft spots. The key is to press the cereal down gently but firmly in a single layer. I like to use the back of a spoon to tap the dish lightly, ensuring the cereal sticks evenly. If you’re in a hurry, lightly mist the top with water or corn syrup to help it adhere better.
Under-Chilling the Treats
Cutting into the treats too soon is the fastest way to end up with a mushy, crumbly mess. The 2-hour chill time is non-negotiable—it lets the marshmallow set and the cereal crisp up. If you’re short on time, a 30-minute freezer session works, but the refrigerator method gives the best texture. Trust me, patience here pays off in every bite. ❄️
Ignoring the Lemon Juice
Omitting the 1 tbsp lemon juice might seem minor, but it’s what balances the sweetness and keeps the apples from tasting flat. Without it, the caramelized apples can taste overly sugary or dull. I always add it—it’s the secret to that bright, fresh apple flavor that makes these treats special.
Using the Wrong Apples
Not all apples caramelize the same way. Soft varieties like Fuji or Gala turn mushy, while tart Granny Smiths hold their shape beautifully. If you’re using a different apple, test a small batch first. The texture of your treats depends on it—no shortcuts here! 🍏
Nutrition facts
Frequently asked questions
Can I make these treats without marshmallow fluff?
Yes! Use 14 oz mini marshmallows instead—just melt them with 1 tbsp corn syrup in a microwave-safe bowl (30-second bursts) until completely smooth. The texture will be slightly different but still delicious. For a vegan option, substitute marshmallow fluff with vegan marshmallow cream or melted coconut cream.
How do I store leftovers to keep them fresh?
Store in an airtight container at room temperature for up to 5 days. For longer storage, wrap tightly in plastic and freeze for 3 months. Thaw at room temperature for 10 minutes before serving. The powdered sugar topping helps preserve freshness, but avoid refrigerating—it can make the cereal soggy.
What's the best way to cut these treats for serving?
Use a sharp knife dipped in hot water between cuts to prevent sticking. For clean edges, press down firmly and wipe the knife after each slice. Cut into 12 equal squares (about 2x2 inches) or triangles for a festive look. The chilled treats hold their shape beautifully, making them perfect for gift boxes or party platters.
Can I add other fruits to this recipe?
Try diced pear or peach with ½ tsp ginger for a tropical twist. For a berry version, swap apples for 1 cup mashed strawberries and reduce sugar to 1 cup. Just adjust cooking times—berries soften faster than apples. The key is keeping the fruit tender but not mushy for the best texture.
Why did my treats turn out too sticky?
This usually happens from overmixing the marshmallow or not chilling long enough. The marshmallow should be just melted, not whipped. Also, ensure the cereal layer is pressed firmly and the treats chill 2 hours (or 30 minutes in freezer). If they're still sticky, sprinkle extra cereal on top and press gently to create a crispy outer layer.