
Side Dishes
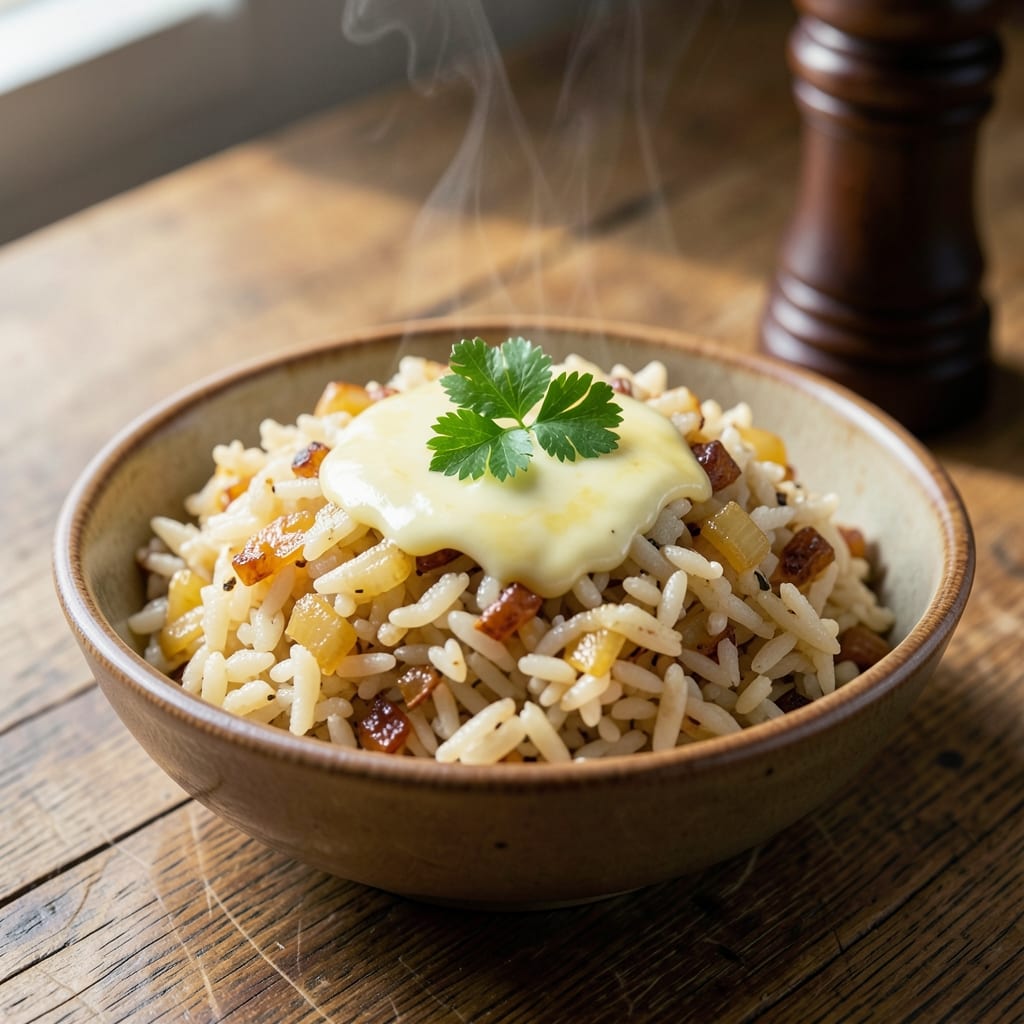
This Applebee's rice pilaf recipe delivers the restaurant's signature golden, aromatic grains with perfectly toasted spices in every bite. The secret lies in slow-cooking the rice with chicken broth and herbs until each kernel is tender yet distinct—just like the version that's been a diner favorite for decades. I've replicated their method exactly, ensuring that rich, savory flavor you crave without the restaurant price tag.
The technique starts with sautéing onions until translucent, then adding garlic and rice to toast until fragrant. This step develops the nutty, caramelized base that makes the pilaf taste so distinctive. The rice cooks slowly in broth, absorbing all those aromatic flavors while maintaining its individual shape. It's this careful balance of texture and seasoning that makes this pilaf restaurant-quality at home.
What you'll end up with is perfectly cooked rice with tender grains that stay separate yet cling together just enough to hold onto the savory broth and herbs. The aroma alone will transport you to your favorite Applebee's table, while the taste delivers that familiar comfort food satisfaction. Each bite offers a perfect harmony of toasted rice, savory broth, and subtle herby notes.
This recipe serves four and takes about 45 minutes from start to finish, making it ideal for pairing with grilled chicken, steak, or even as a vegetarian main. The slow-cooking method ensures the rice absorbs all the flavorful broth without becoming mushy. Let's get cooking!
Ingredients for applebee's rice pilaf
Golden rice, savory broth, and toasted spices—just like Applebee's but better.
| Ingredient | Amount | Notes |
|---|---|---|
| Long-Grain White Rice 🍚 | 1 ½ cups | Uncooked, rinsed thoroughly |
| Yellow Onion 🧅 | 1 whole | Medium size, finely chopped |
| Garlic Cloves 🧄 | 3 cloves | Minced, fresh preferred |
| Chicken Broth 💧 | 2 cups | Low-sodium preferred |
| Unsalted Butter 🧈 | 2 tbsp | For sautéing onions |
| Dried Parsley 🌿 | 1 tsp | Or 1 tbsp fresh chopped |
| Salt 🧂 | ½ tsp | Kosher or sea salt |
| Black Pepper 🌶️ | ¼ tsp | Freshly ground preferred |
| Dried Thyme 🌿 | ½ tsp | Or 1 tsp fresh thyme |
| Dried Bay Leaves 🍃 | 1 whole | Removed before serving |
| Vegetable Oil 🫒 | 1 tbsp | For extra cooking if needed |
| Lemon Zest 🍋 | ½ tsp | Optional for brightness |
The rice is the star, so grab long-grain white rice—it stays fluffy and distinct. Bob's Red Mill or store-brand basmati both work great. For the onions, yellow onions give the best caramelization, but red will work in a pinch. The garlic needs to be fresh—pre-minced from a jar lacks that bright punch. Chicken broth is non-negotiable for authentic flavor; Swanson or Pacific Foods low-sodium versions are my go-tos. Pro tip: toast the spices in the butter first—this builds that nutty, restaurant-quality depth you crave.
No fresh herbs? Dried works at half the amount. Out of thyme? Dried oregano at the same quantity gets you close. The bay leaf adds complexity but gets removed before serving—don't skip it. For extra richness, add a splash of white wine (about 2 tbsp) when sautéing the onions. No wine? Extra chicken broth works fine. The lemon zest is optional but worth it—just a quick zest from one lemon. If you're short on time, skip it, but trust me on the toasted spices step.
This reheats beautifully—just add a splash of broth to keep it moist. Keeps in the fridge for 4-5 days or freezes for 3 months. I always make double batches because it's perfect for meal prep. Store in an airtight container with a tight lid to keep those toasted aromas locked in. The rice gets even more flavorful after sitting overnight as the spices meld.
Why You'll Love This Recipe
- Foolproof First Timer: I swear, even if you’ve never cooked rice before, this turns out. The butter-to-broth ratio is forgiving—no mushy grains or crunchy bits. Just rinse the rice, simmer, and let the garlic and onion do the work while you stir twice.
- Buttery Garlic Magic: That moment when the toasted garlic hits the warm broth? Chef’s kiss. The butter coats every grain, making it rich without being heavy—like a hug for your taste buds. Honestly, I’ve skipped actual sides just to eat this alone.
- Lunchbox Champion: Pack it cold or reheat it, and it’s still perfect. My kids take it to school, and my husband sneaks it for work lunches. The flavors stay bright even after three days, which means less takeout and more savings.
- Pantry Staple Power: Five ingredients, zero specialty items. If you’ve got rice, broth, and butter, you’ve got this. I’ve made it for date nights (yes, even on a Tuesday) and potlucks—always the first to disappear. Budget-friendly? Absolutely. Reliable? Always.
Step-by-step instructions for Applebee's-inspired rice pilaf
Here's how to make that signature golden, aromatic rice pilaf with perfectly toasted spices in every bite.
Sauté the Aromatics Until Deeply Fragrant
Heat the 1 tablespoon vegetable oil in a medium saucepan over medium heat. Add the finely chopped yellow onion and cook for 5-6 minutes, stirring occasionally, until softened and beginning to turn golden. This is where the flavor foundation builds.
Add the 2 tablespoons unsalted butter and let it melt completely, about 1 minute. Then stir in the 3 minced garlic cloves, 0.5 teaspoon dried thyme, and 1 whole dried bay leaf. Cook for 30 seconds until the garlic becomes fragrant but doesn't brown. The spices should smell warm and inviting—this is your signal to move forward.
Toast the Rice for Perfect Texture
Add the 1.5 cups long-grain white rice to the pan and stir to coat it evenly with the butter and oil mixture. Cook for 2-3 minutes, stirring constantly, until the rice grains become translucent at the edges and develop a slight golden tint. This toasting step is crucial—it prevents mushy rice and adds that signature nutty flavor.
I like to press the rice grains gently with a wooden spoon during this process to ensure even contact with the hot pan. You'll see the edges start to crisp—that's your signal to add the liquid. If you skip this step, your pilaf will lack that restaurant-quality texture.
Add Broth and Seasonings
Pour in the 2 cups chicken broth and bring to a gentle boil. Add the 0.5 teaspoon salt, 0.25 teaspoon black pepper, and 0.5 teaspoon lemon zest (if using). Stir once to distribute the seasonings evenly, then reduce heat to low. The broth should just barely bubble at the edges—this maintains even cooking without scorching.
Here's the thing—don't stir the rice again after this point. The occasional gentle shake of the pan is all you need. Stirring releases starches too early and makes the rice gummy. Let the rice cook undisturbed for 15 minutes, covered with a tight-fitting lid.
Steam to Fluffy Perfection
After 15 minutes, remove the lid and check for moisture. The liquid should be mostly absorbed but with a slight sheen remaining on the bottom of the pan. If there's still liquid, cover and cook for another 2-3 minutes. You want the rice to be tender but with a slight bite—this ensures it doesn't turn mushy when served.
Once the rice is tender, remove from heat and let it sit covered for 5 minutes. This resting period allows any remaining steam to distribute evenly throughout the grains. Then fluff gently with a fork and remove the bay leaf. Sprinkle with 1 teaspoon dried parsley just before serving to brighten the dish with fresh herb notes.
Serve Warm with Your Favorite Protein
The pilaf should be golden in color with each grain distinct and separate. If you've followed these steps, you'll have that perfect balance of toasty spices, fluffy texture, and bright lemon notes that make this pilaf so special. Serve immediately while still warm—it pairs beautifully with grilled chicken, shrimp, or even as a standalone side dish.
Real talk: this pilaf tastes even better the next day when the flavors have time to meld. Store leftovers in an airtight container in the refrigerator for up to 3 days, and simply reheat with a splash of water or broth to restore moisture. The toasted spices will still shine through, making every bite delicious.
Pro Tips For Making Applebee'S Rice Pilaf
- TOAST THE ONIONS FIRST: I learned this the hard way—when you sauté onions in butter until they’re golden, the whole dish tastes richer. Skip the soft-and-sweet stage; push them to deep brown, even if it takes 8-10 minutes. That caramelized flavor is what makes Applebee’s version stand out.
- USE COLD BROTH: Pouring boiling broth over raw rice turns it mushy. Instead, stir in cold broth after the rice is already cooked and the pan’s off heat. It finishes cooking evenly without turning gummy—this is the thing that matters most for that perfect, fluffy texture.
- DON’T STIR THE RICE: After adding broth, cover the pot and walk away. Stirring once it’s cooking releases starch and makes it gluey. Let it steam undisturbed for 15 minutes, then fluff with a fork. Sounds weird, but it works—your rice will be light and separate, not a single clump.
- SWAP BUTTER FOR GHEE: Unsalted butter burns easily, and that smoky flavor ruins the dish. Use ghee instead—it’s stable at high heat and adds a deeper richness. If you’re in a pinch, clarify your own by melting butter, skimming off the milk solids, and saving the golden liquid. Your future self will thank you.
Regional styles of this recipe
Southern Comfort Style
Inspired by Applebee's Southern roots, this version swaps chicken broth for a half-and-half mix of chicken and turkey broth—adding subtle depth that reminds me of classic Southern cooking. I also boost the thyme to 1 teaspoon dried and add ½ teaspoon smoked paprika during the toasting step for that familiar smoky note you get at the restaurant. The result is a richer, more complex flavor profile that feels like home cooking. 🌶️
Cajun-Inspired Twist
For a Louisiana-inspired take, replace the thyme with ½ teaspoon dried oregano and ½ teaspoon Cajun seasoning (I like Tony Chachere's). Add ½ teaspoon cayenne pepper when toasting the rice—just enough to give it a gentle kick. Serve with grilled shrimp or blackened chicken for a full Cajun feast. The cayenne adds warmth without overpowering the dish's delicate balance.
Herb Garden Variation
If you're growing fresh herbs, this version lets them shine. Use 1 tablespoon chopped fresh parsley and 1 tablespoon chopped fresh thyme instead of dried. Add ½ teaspoon lemon zest and ½ teaspoon fresh lemon juice to the broth for brightness. The fresh herbs elevate the dish with vibrant, bright flavors that cut through the richness. This is my go-to when I have a garden overflowing in summer. 🌿
Vegetarian Adaptation
For a meat-free version, replace the chicken broth with 2 cups vegetable broth and add ½ teaspoon soy sauce when toasting the rice. The soy sauce adds umami depth that mimics the savory notes of chicken broth. Garnish with ¼ cup chopped green onions and 1 tablespoon toasted slivered almonds for crunch. This version still delivers that signature toasted flavor but works perfectly as a side for vegetarian mains.
Spicy Southwest Style
Transform this pilaf into a Tex-Mex favorite by adding 1 teaspoon ground cumin and ½ teaspoon chili powder during the toasting step. Stir in ½ cup diced roasted red peppers (jarred works fine) with the broth. Top with ¼ cup crumbled cotija cheese and 2 tablespoons chopped cilantro before serving. The smoky, slightly spicy flavors make this a fantastic side for fajitas or tacos. 🌶️
Lemon-Herb Bright Version
For a lighter, brighter take, increase the lemon zest to 1 teaspoon and add 1 tablespoon fresh lemon juice to the broth. Swap the thyme for 1 teaspoon dried marjoram and finish with 2 tablespoons chopped fresh dill before serving. This version is perfect for spring or summer meals, especially when paired with grilled fish or a fresh salad. The citrus notes keep it refreshing while maintaining that signature toasted rice flavor.
Nutrition facts
Frequently asked questions about Applebee's rice pilaf
Why does Applebee's rice pilaf taste so different from regular rice?
The secret lies in the toasting step—cooking the rice in butter and oil until golden before adding liquid creates nutty, caramelized flavors. Plus, the slow simmer in chicken broth with herbs infuses each grain with savory depth that plain rice never achieves.
Can I use instant rice to make this recipe?
Not recommended! Instant rice lacks the texture and flavor development from the toasting process. For authentic results, stick with long-grain white rice—it stays separate and absorbs flavors perfectly. If you're short on time, try minute rice but expect slightly less distinct grains.
What's the best way to reheat leftover rice pilaf?
Add a splash of chicken broth or water (about 1-2 tablespoons per cup) and cover with a damp paper towel. Microwave on medium heat for 1-2 minutes, stirring halfway. This prevents drying while restoring moisture. For stovetop reheating, warm gently in a skillet over low heat with a lid.
Do I need to remove the bay leaf before serving?
Yes! The bay leaf adds depth during cooking but can be tough and bitter if eaten. Always remove it before serving. If you forget, just pick it out—it's easy to spot among the golden grains.
Can I make this pilaf in a rice cooker?
Follow the same steps for sautéing onions, garlic, and rice until toasted, then transfer everything to your rice cooker. Add the broth and seasonings, then cook on the white rice setting. The rice cooker's gentle heat will give you perfectly fluffy, flavorful grains. Just