
Main Courses
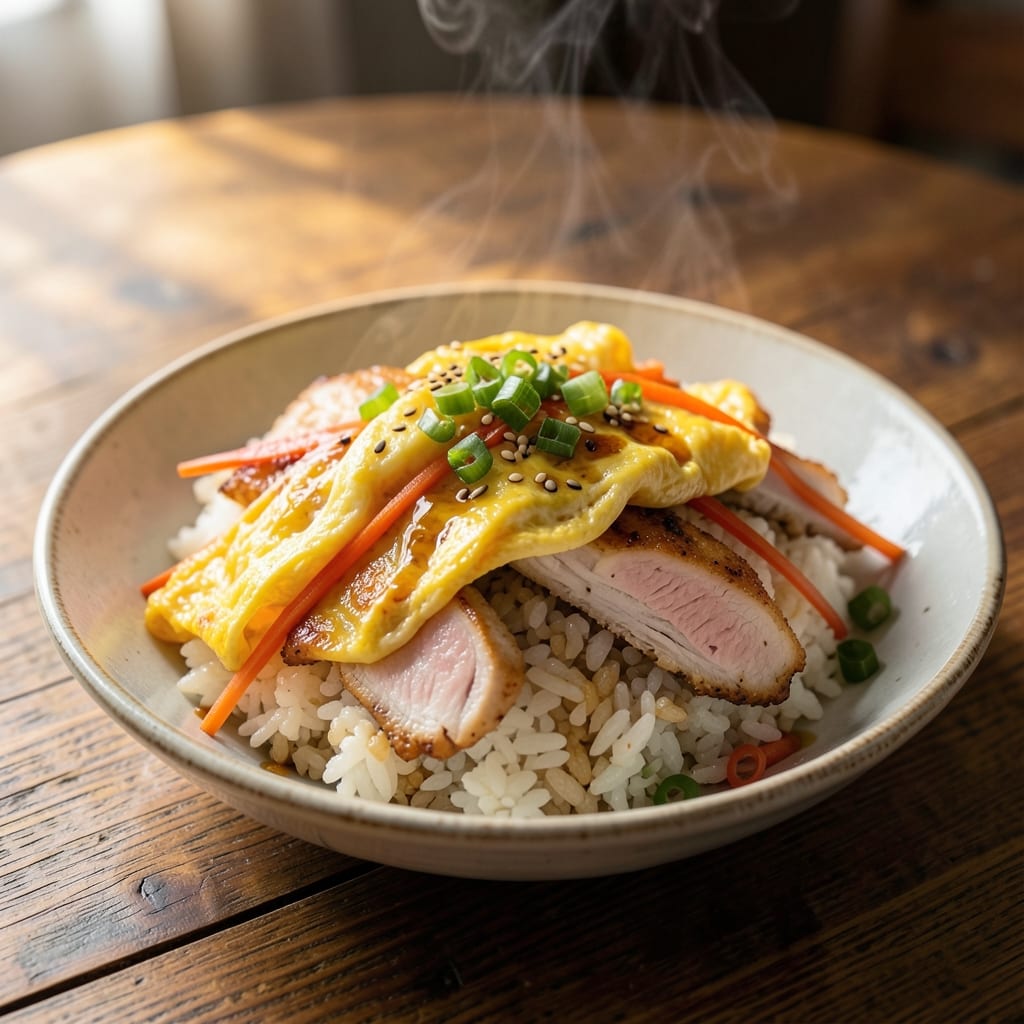
This Arashi fried rice recipe delivers the perfect balance of crispy edges, tender eggs, and vibrant vegetables in every bite—just like your favorite Japanese home-style meal. 🔥 The secret lies in using day-old rice, high-heat stir-frying, and a savory dashi-soy base that transforms simple ingredients into something extraordinary. I developed this version after years of experimenting to capture that authentic restaurant quality at home, where every component comes together in harmony.
The beauty of this dish is its adaptability—whether you're using chicken, shrimp, or tofu for protein, the technique remains the same. We'll start with properly cooked rice (the foundation), then build layers of flavor through quick stir-frying with vegetables and a perfectly scrambled egg that stays moist and tender. The key to that signature crispy texture? A hot wok or skillet and just the right amount of oil to create a satisfying sizzle.
By the time you're done, you'll have a fragrant, one-pan feast that's packed with umami from the dashi, sweetness from the vegetables, and a savory depth from the soy sauce. The crispy egg and slightly charred edges add texture contrast that makes every bite exciting. This isn't just fried rice—it's a complete, satisfying meal that comes together in under 30 minutes.
Serve it as a main dish with miso soup or edamame for a full Japanese-inspired meal, or enjoy it as-is with pickled ginger on the side. The leftovers actually improve overnight as flavors meld, making this an excellent recipe for meal prep. Let's get cooking—your taste buds will thank you.
Ingredients for arashi fried rice
Day-old rice, crispy eggs, and vibrant veggies—this Japanese-style fried rice delivers restaurant-quality flavor with simple ingredients.
| Ingredient | Amount | Notes |
|---|---|---|
| Day-Old Japanese Short-Grain Rice 🍚 | 4 cups | Cooked and cooled overnight |
| Large Eggs 🥚 | 4 whole | Freshly beaten for crispy edges |
| Vegetable Oil 🫒 | ½ cup | High smoke point preferred |
| Boneless Chicken Breast 🍗 | 1 lb | Diced into 0.5-inch pieces |
| Carrots 🥕 | 1 medium | Julienned into thin strips |
| Green Onions 🧅 | ½ lb | White and green parts separated |
| Frozen Peas 🌱 | ½ cup | Thawed before using |
| Dried Shiitake Mushrooms 🍄 | 6 whole | Rehydrated in warm water |
| Dashi Powder 🍜 | 1 tbsp | High-quality for umami depth |
| Soy Sauce 🥢 | ½ cup | Japanese style preferred |
| Sesame Oil 🌿 | 1 tbsp | Toasted for aroma |
| Toasted Sesame Seeds 🌰 | 1 tbsp | For garnish |
| Kosher Salt 🧂 | 1 tsp | Diamond Crystal preferred |
| White Pepper 🌶️ | ¼ tsp | Freshly ground |
The rice is non-negotiable—day-old works best as it holds up to stir-frying without turning mushy. Japanese short-grain rice is ideal, but jasmine or basmati work in a pinch. For the chicken, boneless breast stays tender when diced small—thighs work too but can dry out. Look for fresh shiitake mushrooms at an Asian market (they're worth it), but dried ones rehydrated in warm water do the trick. The dashi powder is where the magic happens—Honten or Marukome brands deliver the most authentic umami. If you can't find it, a pinch of MSG plus a splash of soy sauce mimics it pretty well.
No dashi powder? A dash of fish sauce plus a splash of mirin gets you close, though it won't be identical. Short on chicken? Shrimp or tofu works beautifully—just adjust cooking time. The frozen peas are a must for that bright pop of color and texture, but if you're using fresh, shock them in ice water first to keep them vibrant. Sesame oil should be toasted, not the cheap salad dressing kind—Kadoya is my go-to. For the soy sauce, Japanese-style (like Kikkoman) has a deeper flavor than American brands. And if you're feeling fancy, truffle oil in the final drizzle adds a gourmet twist that pairs perfectly with the crispy egg.
This dish tastes even better the next day as flavors meld—portion into containers for easy lunches. Store leftovers in the fridge for up to 4 days or freeze for 3 months. The crispy egg technique is key: beat eggs with a pinch of salt before cooking, then let them sit in the hot pan until edges are golden and centers are just set. For extra crispiness, fold the eggs into the rice at the very end so they stay intact. Garnish with toasted sesame seeds right before serving—no need to refrigerate the garnish ahead of time, as it keeps well at room temperature for a few hours.
Why You'll Love This Recipe
- One-Pan Magic: I swear, this dish is the closest thing to a cooking hack. Toss everything—rice, chicken, eggs, carrots—into one pan, and let the residual heat from the oil do most of the work. No chopping boards, no extra pots, just sizzle and satisfaction.
- Crispy Eggs, Silky Rice: That runny yolk pooling over the slightly charred edges of the rice? Pure magic. The secret’s in the eggs—scrambled just enough to coat the rice but still holding that creamy center, while the chicken stays juicy from a quick sear. Honestly, it’s the kind of texture combo that makes you pause mid-bite.
- Lunchbox Hero: Between us, this is my go-to for meal prep. Double the batch, pack it in containers, and you’ve got a week’s worth of lunches that won’t turn to mush. The carrots stay crisp, the rice doesn’t get soggy, and the chicken reheats like it’s fresh off the pan. (Yes, even on a Tuesday night.)
- Budget Win: Chicken breast, eggs, and carrots are cheap staples, but they feel like a restaurant meal. I’ve made this for date nights, family dinners, and solo nights in—no guilt, just flavor. Plus, leftovers taste even better the next day, which means less waste and more happy meals.
Step-by-step instructions for Arashi fried rice
Here's how to create restaurant-quality Arashi fried rice with perfectly crispy egg edges and vibrant veggies.
🍳 Step 1: Prepare the Base Ingredients
First, rehydrate the 6 whole dried shiitake mushrooms in warm water for 20 minutes, then finely chop them. Thinly slice the 1 medium carrot into julienne strips and separate the 0.5 lb green onions into white and green sections. Dice the 1 lb boneless chicken breast into ½-inch pieces and thaw the ½ cup frozen peas in a colander under warm water.
I like to prep everything while the wok heats up—this keeps the workflow smooth. The mushrooms should be tender but not mushy after rehydration, and the chicken pieces should be uniform for even cooking. Lay out all your prepped ingredients on a plate so they're ready to go in order.
🔥 Step 2: Cook the Chicken and Vegetables
Heat 0.5 cup vegetable oil in a large wok or skillet over high heat until shimmering. Add the diced chicken and stir-fry for 3-4 minutes until just cooked through—it should be opaque but still slightly pink in the center. Remove and set aside.
In the same wok, add a bit more oil if needed, then stir-fry the carrot julienne and white onion sections for 2 minutes until softened but still vibrant. Add the rehydrated shiitake mushrooms and cook for another 1 minute. Finally, add the ½ cup thawed peas and toss for 30 seconds until heated through. Remove everything to a plate and keep warm.
👨🍳 Step 3: Create the Perfect Egg Mixture
In a bowl, beat the 4 whole large eggs with 1 tsp kosher salt and 0.25 tsp white pepper until frothy but not fully emulsified. I like to use a fork for this—just enough to blend without overworking. This mixture should be thick enough to hold its shape when poured but still flow smoothly.
Here's the thing—this step is crucial for those crispy egg edges. If the eggs are too runny, they'll turn into scrambled bits. If they're too thick, they won't spread properly. The perfect consistency is like soft-serve ice cream—thick but still pourable.
🥘 Step 4: Assemble and Cook the Fried Rice
Return the wok to high heat with 1 tablespoon vegetable oil. Add the 4 cups day-old Japanese short-grain rice and stir-fry for 2 minutes to toast the grains and release their flavors. Pour in the egg mixture and let it spread and set for 30 seconds before gently folding it into the rice with a spatula.
Add the cooked chicken and vegetable mixture back to the wok. Stir in 0.5 cup soy sauce, 1 tablespoon dashi powder, and 1 tablespoon sesame oil. Cook for 3-4 minutes until everything is heated through and the rice is evenly coated. Taste and adjust seasoning—you might need a bit more soy sauce for saltiness or a pinch more salt for balance.
🍽️ Step 5: Finish and Serve
Transfer the fried rice to a serving plate and let it sit for 1 minute to allow the flavors to meld. Garnish with the green onion sections and 1 tablespoon toasted sesame seeds. The rice should be hot, the egg edges crispy, and the vegetables vibrant with color.
For that authentic Arashi touch, serve immediately with a drizzle of extra sesame oil. Each bite should deliver a perfect balance of textures—crispy egg edges, tender chicken, and al dente vegetables—all wrapped in that umami-rich rice. The crispy egg edges are the star here, so don't skip the proper egg mixture preparation!
Pro Tips For Making Arashi Fried Rice
- CRISPY CHICKEN FIRST: I learned this the hard way—if you toss the chicken in last, it’ll steam instead of sear. Cut the breast into bite-sized pieces, season with salt, and cook them in the wok until fully done (no pink!) before adding anything else. This guarantees tender, flavorful bites that don’t turn rubbery when the rice gets stirred in.
- SCRAMBLE EGGS FAST: High heat is your friend here. Crack the eggs into a bowl, beat them just until the yolks and whites are combined (no overmixing), then pour them into the wok and let them set for 10 seconds before folding. The result? Soft, creamy curds that don’t turn into rubbery scraps—even if you’re not a pro at scrambling.
- DICE CARROTS SMALL: Skip the big chunks—this isn’t stir-fry, it’s fried rice. Cut the carrots into ¼-inch pieces so they soften in the same time it takes the rice to crisp up. Too big, and you’ll end up with chewy bits that ruin the texture. (Yes, even if you’re impatient like me.)
- USE DAY-OLD RICE: Fresh rice is a disaster in fried rice—it turns mushy and gloppy. The starch needs time to dry out, so use rice that’s been sitting in the fridge for at least 24 hours. Break up any clumps with your hands before adding it to the wok, or you’ll end up with uneven cooking.
Serving suggestions for arashi fried rice
Classic Japanese Pairings
Serve your Arashi fried rice with steaming hot miso soup—its fermented depth complements the dish's umami perfectly. I love using red miso for a richer flavor, especially when paired with soft tofu cubes and wakame seaweed. For a complete meal, add edamame on the side—their buttery texture contrasts beautifully with the crispy egg edges. 🍜
Protein Swap Options
If you're using shrimp instead of chicken, serve with a side of pickled ginger to cut through the seafood's richness. For a vegetarian version with tofu, pair it with quick-pickled cucumbers—the tangy crunch balances the fried rice's savory notes. Both options elevate the dish while keeping it authentic to Japanese home-style dining. 🥗
Garnish Upgrade Ideas
For extra flair, top your fried rice with crispy fried shallots—they add a delicate crunch that stands up to the crispy egg. A sprinkle of bonito flakes (katsuobushi) gives a smoky aroma, while shredded nori strips add a briny contrast. I like to serve these garnishes in small bowls so everyone can customize their dish. ✨
Beverage Recommendations
Match your meal with a green tea like Sencha—its grassy notes cleanse the palate between bites. For something lighter, try ramune soda (Japanese lemon-lime) to balance the dish's richness. If you prefer alcohol, a dry sake or chilled Japanese lager like Asahi works beautifully. 🍶
Meal Prep Serving Tips
When reheating leftovers, add a splash of water or chicken broth to prevent drying. Serve in small bento boxes with compartments for rice, protein, and veggies to keep everything fresh. For a lunchbox-friendly version, pack with chopstick-friendly cuts of protein and a small container of extra soy sauce. 📦
Dessert Pairings
Finish your meal with matcha mochi—its chewy texture and earthy sweetness contrast perfectly with the savory fried rice. For something lighter, try yuzu sorbet to refresh your palate. Both desserts highlight the natural flavors of the dish without overpowering it. 🍡
Nutrition facts
Frequently asked questions
Why does the recipe call for day-old rice?
Day-old rice is essential because its slightly drier texture prevents it from turning mushy during stir-frying. Freshly cooked rice releases too much moisture, which can make your fried rice soggy. The grains also become firmer overnight, holding up better to high-heat cooking while maintaining that perfect bite. Pro tip: Spread cooked rice on a tray to cool evenly for best results.
Can I use regular long-grain rice instead of Japanese short-grain?
You can try it, but Japanese short-grain rice is ideal because its sticky texture binds better during stir-frying. For a substitute, use jasmine rice (which has a similar stickiness) or sushi rice. If using long-grain rice, you may need to reduce the soy sauce slightly since it absorbs less liquid. The flavor won't be identical, but it'll still taste delicious!
How do I get the crispy egg edges like in restaurants?
The secret lies in proper egg preparation and timing! Beat the eggs with salt and pepper until frothy (not fully emulsified), then pour them into the hot wok and let them set for 30 seconds before folding into the rice. The edges should be golden and slightly crispy while the centers stay tender. Use a non-stick or well-seasoned wok for even browning, and avoid stirring too soon.
What if I don't have dashi powder?
No problem! You can substitute with a combination of 1 tbsp soy sauce + ½ tsp fish sauce + ½ tsp mirin for umami depth. Alternatively, use 1 tsp MSG + 1 tbsp soy sauce if you have it. While not identical, these alternatives will still give your fried rice that savory Japanese flavor profile. The dish will taste different but still delicious!
Can I make this with frozen vegetables instead of fresh?
Frozen peas and corn work perfectly—they're pre-cut and convenient. Just thaw them in a colander under warm water before using. For other frozen veggies like broccoli or bell peppers, blanch them first (boil for 1 minute, then shock in ice water) to maintain their color and texture. The frozen veggies will add a nice bright contrast to the dish.