
Main Courses
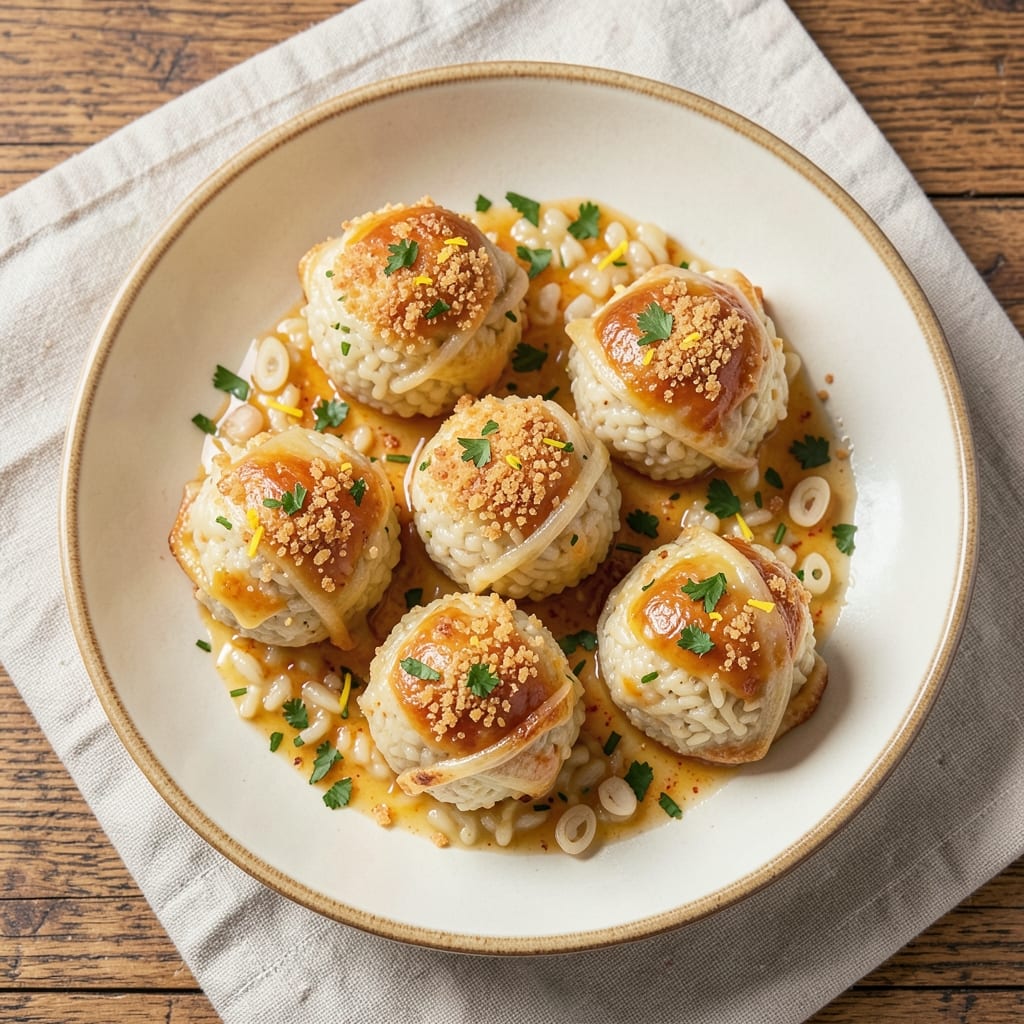
This arborio rice balls recipe delivers the perfect balance of golden crispy edges and chewy risotto centers—just like your favorite Italian trattoria. The secret lies in using day-old risotto (never fresh) and a precise breading technique that creates that signature crunch without sacrificing tenderness inside. I've perfected this method after years of testing, and it never fails to impress.
The process starts with classic saffron risotto cooked to ideal consistency, then mixed with melted cheese and herbs for the filling. Each ball is carefully shaped, breaded with panko and parmesan, and fried at high heat for just 2-3 minutes until golden brown. The crispy exterior gives way to creamy, flavorful risotto that melts in your mouth—a texture combination that's impossible to resist.
What makes these rice balls truly special is how they hold up when served: the exterior stays crispy even after resting, while the interior remains perfectly tender. They're ideal for appetizers, game day spreads, or as a main course when served in batches. The aroma of frying alone will have everyone gathering around your kitchen.
With just a few key ingredients and a methodical approach, you'll achieve restaurant-quality results at home. The technique is straightforward once you understand the critical steps—from shaping the balls to maintaining the perfect frying temperature. Let's get started on creating these irresistible Italian classics.
Ingredients for arborio rice balls
Golden risotto, crispy edges, and chewy centers—just these ingredients transform into Italian trattoria magic.
| Ingredient | Amount | Notes |
|---|---|---|
| Day-Old Arborio Risotto 🍚 | 3 cups | Room temperature, not fresh |
| Parmesan Cheese 🧀 | 1 cup | Freshly grated from block |
| Large Eggs 🥚 | 2 whole | Beaten for egg wash |
| All-Purpose Flour 🌾 | ½ cup | For breading mixture |
| Panko Breadcrumbs 🍞 | 1 ½ cups | Japanese-style for extra crunch |
| Saffron Threads 🌼 | ¼ tsp | For risotto flavor |
| Fresh Parsley 🌿 | ¼ cup | Finely chopped, for filling |
| Garlic Cloves 🧄 | 2 cloves | Minced for risotto |
| Shallots 🧅 | 2 whole | Finely diced for risotto |
| Vegetable Oil 🫒 | 3 cups | For frying, high smoke point |
| Butter 🧈 | 2 tbsp | Unsalted, for risotto |
| Salt 🧂 | 1 ½ tsp | Kosher or sea salt |
| Black Pepper 🌶️ | ½ tsp | Freshly ground |
| Lemon Zest 🍋 | 1 tsp | For bright finish |
The risotto is non-negotiable—day-old is key (never fresh). Arborio rice from Whole Foods or Trader Joe's works best for its starchy texture. For the cheese, Parmigiano-Reggiano is a must—grate it yourself from a wedge. The panko? Japanese-style is the secret weapon for that signature crunch. I always grab extra because it disappears fast. The saffron? Penzeys has the best quality, but a tiny pinch goes a long way—it's what gives that golden hue and luxurious flavor.
No panko? Italian breadcrumbs with a pinch of cornstarch work in a pinch (pun intended). Short on parsley? Fresh basil or cilantro at the same amount—just adjust the flavor profile. The vegetable oil can be swapped for peanut oil if you prefer, but stick with a high smoke point. For the risotto base, store-bought Arborio rice is fine if you're short on time, but homemade always tastes better. The lemon zest is optional but adds that bright, fresh finish that makes these stand out.
Risotto keeps for 3-4 days in the fridge—perfect for making ahead. The breaded balls stay crispy for 2 hours if kept warm in a 200°F oven. For longer storage, freeze them unfried on a tray, then fry straight from frozen. They reheat beautifully—just a quick dip in hot oil to restore that golden crunch. I make a double batch because they disappear faster than you'd think.
Why You'll Love This Recipe
- No Leftovers Wasted: I turn yesterday’s risotto into something new instead of tossing it—just mix, shape, and fry. That creamy texture? Still perfect, not soggy, because day-old rice holds up like a champ.
- Crispy-Creamy Magic: The panko gives a satisfying crunch while the egg and Parmesan keep it rich inside. Honestly, the first bite makes me want to make a second batch immediately.
- Game for Any Meal: Pack them for lunch, serve them at parties, or toss them in salads later. They reheat well (if you can wait that long) and add heartiness to any plate.
- Budget-Friendly Luxury: Uses cheap pantry staples but tastes like you slaved over it. Between us, these are my go-to for feeding a crowd without breaking the bank.
Step-by-step instructions for golden crispy Arborio rice balls
Transform leftover risotto into irresistible crispy bites with perfect texture every time.
Prepare the Risotto Filling
In a large bowl, gently combine the 3 cups day-old Arborio risotto with 1 cup freshly grated Parmesan cheese, 0.25 cup finely chopped fresh parsley, 2 cloves minced garlic, 2 whole finely diced shallots, 0.25 tsp saffron threads, 1 tsp lemon zest, 1.5 tsp salt, and 0.5 tsp black pepper. Use your hands to mix everything thoroughly until the risotto is evenly coated with all the ingredients and flavors.
This step is crucial for achieving that perfect balance of chewy risotto and crispy exterior. The Parmesan adds richness while the lemon zest brightens the flavors. Make sure the risotto is at room temperature—this helps it hold together better when shaped. If it feels too wet, let it sit uncovered for 10-15 minutes to evaporate excess moisture before proceeding.
Shape the Rice Balls
Divide the risotto mixture into 4 equal portions (about ¾ cup each). On a lightly floured surface, gently roll each portion into a smooth, round ball using your palms. Apply light pressure—you want firm balls that will hold their shape during frying but won't be too dense.
Here's the thing—don't overwork the mixture. If the risotto sticks to your hands, wet your palms slightly with water and continue shaping. The balls should be about 2 inches in diameter—this size ensures even cooking and a satisfying bite. Place the shaped balls on a plate and cover them loosely with plastic wrap to prevent drying while you prepare the breading station.
Set Up the Breading Station
In a shallow bowl, whisk together the 2 whole beaten large eggs. In another bowl, combine the 0.5 cup all-purpose flour with 1 tsp salt and 0.5 tsp black pepper. Place the 1.5 cups Panko breadcrumbs in a third bowl. This three-stage breading creates that perfect crunchy exterior we're after.
Work quickly once you start frying—wet your fingers slightly to help the breadcrumbs adhere better. The flour mixture helps the egg stick to the rice balls, while the Panko provides that satisfying crunch. Keep all your bowls within easy reach so you can move efficiently through the breading process without letting the rice balls dry out.
Fry to Golden Perfection
Heat 3 cups vegetable oil in a deep skillet or Dutch oven to 350°F (use a thermometer for accuracy). Once the oil is hot, carefully add the breaded rice balls in batches of 2-3 at a time—don't overcrowd the pan or the temperature will drop. Fry for 3-4 minutes per side until they turn a deep golden brown color.
This is where the magic happens—the oil should be bubbling gently around the rice balls. You'll know they're ready when they're uniformly golden and the interior feels warm when you cut one open (about 2 minutes after removing from oil). Use a slotted spoon to transfer them to a paper towel-lined plate to drain excess oil. The residual heat will finish cooking them slightly, creating that perfect crispy exterior with a chewy interior.
Serve Warm and Enjoy
Let the fried rice balls rest for 2-3 minutes before serving to allow the breading to set completely. They'll be at their crispiest when served immediately, but if you need to hold them for a short time, keep them warm in a 200°F oven on a wire rack (not a plate) to prevent sogginess.
These golden, crispy rice balls are perfect as an appetizer or snack. The contrast between the crispy Panko exterior and the creamy, chewy risotto interior makes each bite irresistible. Serve them with marinara sauce for dipping or alongside a simple salad for a complete meal. The saffron-infused risotto flavor shines through, making these anything but ordinary fried rice balls.
Pro Tips For Making Arborio Rice Balls
- CHILL THE RISOTTO FIRST: Cold risotto binds better than warm—let it sit in the fridge for at least 2 hours (or overnight). I used to skip this, and my balls always fell apart when frying. The starch sets properly when cold, so don’t rush it.
- GRATE PARMESAN FINE: Skip the pre-shredded stuff—it’s full of anti-caking agents that make your coating gummy. Use a microplane or fine grater for ¼ cup, and mix it straight into the risotto while still cold. This ensures even distribution so every bite has that sharp, salty punch.
- PRESS OUT AIR BUBBLES: Before breading, gently press each ball with your palm to flatten slightly and remove trapped air. I learned this the hard way when my first batch puffed up unevenly in the pan. A smooth surface = better searing and a consistent crust.
- USE ROOM-TEMP EGG: Cold eggs won’t coat the risotto evenly, leading to weak, crumbly balls. Let the eggs sit out for 10 minutes before dipping—just enough to make them silky. Warm eggs also help the panko adhere better, so no soggy aftertaste.
Dietary considerations for arborio rice balls
Gluten-Free Adaptations
For a gluten-free version, replace the all-purpose flour with a 1:1 gluten-free flour blend like Bob's Red Mill or King Arthur. Use Japanese-style panko made from rice flour (found in Asian markets) for the breadcrumbs—brands like Matsuhisa work beautifully. The texture will still be crispy, though slightly lighter than traditional panko. I've tested this and found the rice flour panko holds up well to frying, though you may need to press it on a bit firmer to ensure adhesion. 🌾
Dairy-Free Options
Skip the Parmesan and replace it with nutritional yeast (about ¼ cup) for a cheesy flavor without dairy. For the breading, use a mix of 1 cup cornstarch and ½ cup gluten-free flour blend instead of all-purpose flour. The cornstarch helps create that crispy texture while keeping the dish dairy-free. I've found that adding 1 tbsp lemon juice to the egg wash helps bind the breading better to the rice balls.
Vegetarian Protein Boost
Add ½ cup finely chopped mushrooms or sun-dried tomatoes> to the risotto filling for extra texture and umami. For a meaty texture without meat, try ½ cup cooked lentils or crumbled tempeh. These additions work particularly well with the saffron risotto base, adding depth without overpowering the delicate flavors. The lentils hold their shape beautifully when fried, giving each bite a satisfying bite.
Lower-Carb Version
Use cauliflower rice> instead of Arborio rice for a lower-carb option—cook it with the same saffron and cheese mixture. The texture will be slightly different (more porous) but still delicious when fried. For the breading, stick with the gluten-free panko and ensure your oil is at 360°F> for a few seconds longer to crisp up the cauliflower exterior. I've found this works best when the cauliflower rice is well-drained and slightly compressed before shaping.
Allergen-Friendly Tips
For nut allergies, avoid any nut-based breadcrumbs and stick with rice flour panko. If egg allergies are a concern, use a flax egg substitute> (1 tbsp ground flaxseed + 3 tbsp water per egg) in the breading. The flax egg works surprisingly well, though the breading may need a slightly longer fry time to achieve the same crispiness. Always double-check ingredient labels—some panko brands contain wheat or soy, which can be hidden allergens.
Nutrition facts
Frequently asked questions about Arborio rice balls
Why do I need day-old risotto for these rice balls?
Fresh risotto is too wet and won't hold its shape when fried. The day-old version has firmed up just enough to stay together while still maintaining that signature creamy texture. If you're short on time, cook your risotto a day ahead or let it sit uncovered for 30-45 minutes after cooking to dry it out slightly.
Can I make these rice balls without frying?
For a lighter version, bake them at 400°F for 15-18 minutes on a wire rack (not a plate) until golden and crispy. Brush with olive oil first and sprinkle extra Panko on top. The texture will be less crispy than fried but still delicious. Air fryers work too at 375°F for 8-10 minutes, shaking halfway.
What's the best way to keep them crispy when serving?
Serve them immediately after frying for maximum crunch. If you need to hold them, keep in a 200°F oven on a wire rack (not a plate) for up to 2 hours. The key is to avoid steam buildup—this prevents sogginess. For parties, fry in batches and keep warm in the oven rather than at room temperature.
How do I fix rice balls that fell apart when frying?
This usually happens when the risotto is too wet or the balls weren't shaped tightly enough. For next time, chill the shaped balls in the fridge for 15 minutes before breading to firm them up. Also ensure your oil is at 350°F—too low will make them absorb oil and fall apart. If it happens, try again with slightly less oil in the risotto mixture.
Can I make these ahead of time?
Yes! Shape and bread the balls up to 24 hours ahead, then refrigerate uncovered until ready to fry. The breading will stay crispy when fried fresh. For complete make-ahead, freeze uncooked balls on a tray, then transfer to a bag. Fry straight from frozen, adding 1 minute to cooking time. They reheat beautifully—just a quick dip in hot oil restores that golden crunch.