
Main Courses
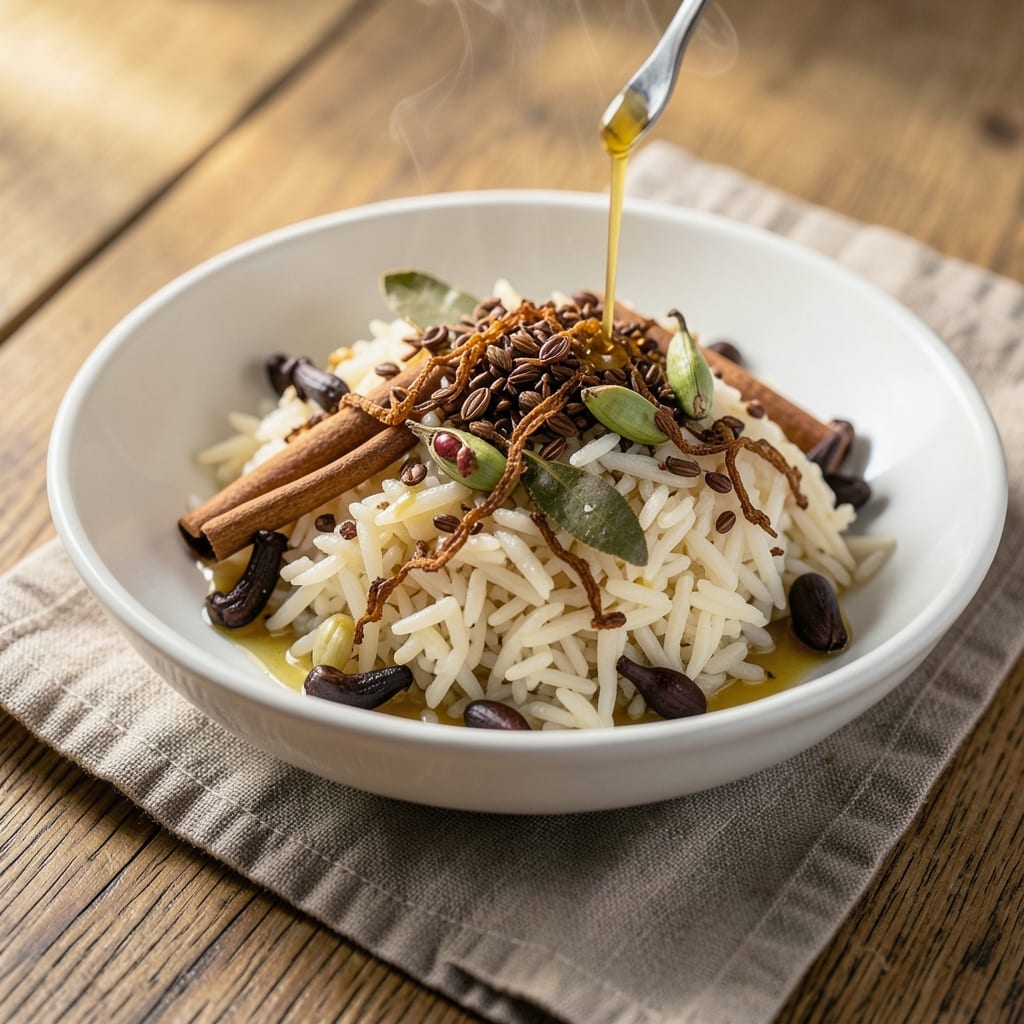
This aroma pressure cooker rice recipe transforms simple basmati into a fragrant, one-pot masterpiece with toasted cumin crunch and warm spices. The pressure cooker infuses every grain with deep, aromatic flavors—cardamom, cinnamon, and cumin—while keeping the texture perfectly fluffy. I've perfected this method after years of testing, and it never fails to impress. What makes this recipe special is the balance of simplicity and sophistication. You'll start with toasted spices in olive oil, then layer in rice, broth, and aromatics before sealing the pot. The pressure cooker does all the work, releasing those flavors into the rice while maintaining ideal moisture levels. No need for constant stirring or guesswork—just set it and let the magic happen. By the time you're done, you'll have restaurant-quality basmati with a delicate crunch from toasted cumin seeds and bright citrus notes from fresh lemon. The aroma alone will have everyone at the table asking what's for dinner. This is the kind of rice that elevates any meal, from weeknight dinners to special occasions. The best part? It's a true one-pot solution—minimal cleanup, maximum flavor. Let's get started on creating this aromatic masterpiece.
Ingredients for aroma pressure cooker rice
One-pot magic with basmati, toasted spices, and zero stovetop stress.
| Ingredient | Amount | Notes |
|---|---|---|
| Long-Grain Basmati Rice 🍚 | 1 ½ cups | Uncooked, rinsed well |
| Vegetable Broth 💧 | 2 cups | Low-sodium preferred |
| Whole Cumin Seeds 🌿 | 1 tbsp | Toasted until fragrant |
| Green Cardamom Pods 🌿 | 6 whole | Lightly crushed |
| Cinnamon Sticks 🌿 | 2 whole | 1-inch pieces |
| Bay Leaves 🌿 | 2 whole | Dried, standard size |
| Cloves 🌿 | 4 whole | Lightly crushed |
| Extra-Virgin Olive Oil 🫒 | 1 tbsp | For toasting spices |
| Salt 🧂 | 1 ½ tsp | Kosher or sea salt |
| Fresh Lemon Juice 🍋 | 1 tbsp | Brightens the rice |
| Fresh Cilantro Leaves 🌿 | ¼ cup | Chopped, for garnish |
The spices are everything here. Whole spices toast better than ground—they release aroma and stay crispy. Hit up the bulk bins at Whole Foods or Trader Joe's for fresh cardamom and cinnamon; those pre-ground spices lose flavor fast. Toast them in olive oil until you can smell them from across the room (about 2 minutes). The cumin seeds? Don’t skip toasting—they’ll turn the rice bitter if raw. For the rice, Indian Basmati from the ethnic aisle has the best texture, but any long-grain works. Rinse it until the water runs clear—this removes excess starch so it stays fluffy.
No whole spices? Ground spices work in a pinch, but cut the amount to half—cardamom 0.5 tsp, cinnamon 0.25 tsp, cloves 0.25 tsp. Out of broth? Water plus 1 tsp soy sauce adds depth. Fresh cilantro? Dried oregano at 1/4 tsp mimics the brightness. The lemon juice is optional but worth it—squeeze it fresh right before serving. For extra crunch, toast 1 extra tbsp cumin seeds in a dry pan and sprinkle on top at the end. And if you’re cooking for a crowd, double everything—this recipe scales perfectly in the pressure cooker.
This rice reheats like a dream—just add a splash of water and steam for 2 minutes. Keeps 4-5 days in the fridge, 3 months frozen. For leftovers, store with a sprinkle of cilantro to keep it fresh. Pro tip: Make a double batch—it’s perfect for burrito bowls, curry bases, or even as a side for grilled meats. The spices stay potent longer if you store them in an airtight container away from light.
Why You'll Love This Recipe
- No-Chop Necessary: I swear by this one—just toss in whole spices, press start, and walk away. The pressure cooker handles the rest while you sip tea or scroll through your phone.
- Warm Spice Magic: That first whiff of toasted cumin and cardamom? It’s like a hug in a bowl. The broth steeps right into the rice, giving it a fragrant depth that’s hard to resist.
- Lunchbox Hero: Between us, this rice reheats beautifully for work lunches. Pack it the night before, and you’ve got a flavorful, filling meal that won’t turn to mush in your bag.
- Pantry Staple Power: Honestly, you’re using ingredients you already own. No fancy swaps—just basmati, broth, and spices you’ve got lingering. It’s the kind of recipe that saves money and stress.
Step-by-step instructions for pressure cooker fragrant basmati
This method delivers restaurant-quality basmati every time—aromatic, perfectly fluffy, and infused with warm spice notes.
Toast the Spice Blend for Maximum Flavor
Heat the pressure cooker on medium heat (no oil needed). Add the 1 tbsp whole cumin seeds and toast for 30 seconds until fragrant and lightly golden. Immediately add the 6 whole green cardamom pods, 2 whole cinnamon sticks, 2 whole bay leaves, and 4 whole cloves, then toast for another 30 seconds until the spices release their essential oils and fill your kitchen with aroma.
This toasting step is crucial—it develops the spices' complex flavors before they infuse the rice. Watch carefully to avoid burning; the moment you smell that deep, toasty aroma, remove the pot from heat. Let the spices cool for 1 minute before proceeding to prevent steam buildup during cooking.
Sauté the Rice in Olive Oil
Return the pressure cooker to medium heat and add the 1 tbsp extra-virgin olive oil. Swirl to coat the spices evenly, then add the 1.5 cups rinsed long-grain basmati rice. Stir for 2-3 minutes until the rice grains become translucent at the edges and the oil is absorbed. This step ensures each grain develops a subtle nutty flavor before cooking.
I like to press down gently on the rice with a wooden spoon during the first minute—this prevents it from clumping and ensures even contact with the oil. The rice should look dry but slightly glossy from the oil absorption. If you notice any browned bits sticking to the bottom, deglaze with 1 tablespoon of the vegetable broth to lift them into the rice mixture.
Add Broth and Seasonings
Pour in the 2 cups vegetable broth and add the 1.5 tsp salt. Stir once to distribute evenly, then secure the pressure cooker lid. Set the valve to sealing position. The rice should be fully submerged—if not, add 1-2 tablespoons of water to ensure proper cooking.
This is where the magic happens: the spices infuse directly into the broth, creating an aromatic base for the rice. The salt should dissolve completely, but don't worry if you see a few grains—this won't affect the final texture. The broth-to-rice ratio is critical for perfectly fluffy grains, so resist the urge to adjust measurements.
Pressure Cook to Perfect Texture
Cook on high pressure for 4 minutes from the time the pressure builds. The pressure cooker will take about 5-7 minutes to come to pressure initially, so plan accordingly. Once the cooking cycle completes, allow the pressure to release naturally for 10 minutes before quick-releasing any remaining pressure.
Natural release is key here—it allows steam to redistribute evenly, preventing gummy rice. You'll know it's ready when the float valve drops and the lid can be safely removed. The rice should look moist but not soupy, with grains that separate easily when stirred. If it appears undercooked, return it to high pressure for 1 additional minute and repeat the release process.
Finish with Lemon and Garnish
After releasing the pressure, open the lid and stir in the 1 tbsp fresh lemon juice. The acid brightens the spices and cuts through the richness of the basmati. Let the rice sit covered for 5 minutes to steam gently—this final step ensures even moisture distribution throughout each grain.
Garnish with the 0.25 cup chopped fresh cilantro leaves just before serving. The contrast between the bright herbs and warm spices creates a perfect balance of flavors. Serve immediately with your choice of protein or as a standalone side dish—this fragrant basmati pairs beautifully with grilled meats or curries.
Pro Tips For Making Aroma Pressure Cooker Rice
- Toast the spices first: The moment you crack open those cardamom pods or cumin seeds, don’t just toss them in raw—they’ll taste like nothing. Dry-toast them in a separate pan for 30 seconds until they release their aroma, then crush lightly with the side of your knife. This makes a real difference in how fragrant your rice ends up.
- Use twice the broth: Pressure cookers can turn rice into glue if you’re not careful. For every cup of basmati, use 2 cups of broth instead of 1½—this keeps the grains separate and prevents that dreaded mushy texture. Yes, it sounds like a lot, but trust me, you’ll end up with lighter, fluffier rice.
- Skip the pre-wash: Basmati rice is already polished, and washing it strips away the starch that helps it hold its shape. Just give it a quick rinse under cold water if there’s visible debris, then drain—no need to scrub it like you’re cleaning a pot. This keeps the grains distinct and prevents gummy rice.
- Add broth halfway: Don’t dump all the broth in at once. Start with 1 cup, pressure cook for 5 minutes, then add the rest. This two-step method lets the spices infuse properly without diluting their flavor too soon. It’s a small tweak, but it guarantees that first bite is packed with aroma.
Pro cooking tips for this recipe
Spice Toasting Secrets
Toast your spices in the pressure cooker itself—no extra pans needed! Start with whole spices (cumin seeds first, then cardamom, cinnamon, bay leaves, and cloves) on medium heat for 30 seconds each. The key is listening for that deep, toasty aroma—it signals the spices are releasing their essential oils. I use a wooden spoon to gently stir them, ensuring even browning without burning. 🌿
Pro tip: If your kitchen smells like a spice shop after toasting, you’re doing it right! Let the spices cool for 1 minute before adding rice and broth. This prevents steam buildup during cooking, which can make your rice gummy. For extra depth, toast 1 extra tbsp cumin seeds in a dry pan until golden and sprinkle them on top after cooking for a nutty crunch.
Broth-to-Rice Ratio
The 2 cups broth to 1.5 cups rice ratio is non-negotiable for fluffy grains. Too much liquid = mushy rice; too little = dry, crunchy bits. Use low-sodium vegetable broth for better flavor control, but if you’re in a pinch, add 1 tsp soy sauce to 2 cups water for umami depth. Always stir the salt into the broth before sealing the lid—this ensures even distribution.
If your rice isn’t fully submerged after adding broth, add 1-2 tablespoons of water before sealing. Never adjust the ratio after sealing—this disrupts the pressure cooking process. I’ve made this mistake (twice!) and ended up with unevenly cooked rice. Trust the measurements!
Pressure Timing Mastery
Your pressure cooker will take 5-7 minutes to build pressure initially—don’t rush it! Once it’s at high pressure, cook for exactly 4 minutes (from the time the float valve jiggles). The natural release for 10 minutes is critical—it lets steam redistribute, preventing gummy rice. Quick-release only after that, or you’ll risk uneven texture.
If your rice looks undercooked after the first cycle, add 1 additional minute of high pressure and repeat the natural release. Overcooking is worse than undercooking—you’ll end up with dry, crunchy grains. I test doneness by stirring with a fork; grains should separate easily and look moist but not soupy.
Lemon Finish Trick
Stir in the 1 tbsp fresh lemon juice right after releasing pressure—this brightens the spices and cuts through the richness. Let the rice steam covered for 5 minutes before serving; this final step ensures even moisture distribution. I garnish with cilantro because its fresh, citrusy notes complement the warm spices perfectly.
For extra fluff, use a fork to gently fluff the rice after the 5-minute rest. Avoid wooden spoons—they can press the grains together, making them dense. This lemon finish is my secret weapon for restaurant-quality rice at home. 💛
Nutrition facts
Frequently asked questions
Can I use jasmine rice instead of basmati in this pressure cooker recipe?
Yes, but with adjustments! Jasmine rice has a stickier texture, so reduce the broth by 1/4 cup (use 1.75 cups instead of 2 cups) and increase cooking time to 5 minutes on high pressure. The aromatic qualities will still shine, but expect slightly softer grains. For extra fluff, let it rest 10 minutes covered after cooking.
Why does my pressure cooker rice turn out gummy?
Over-releasing pressure or incorrect ratios cause this. Always do a 10-minute natural release after cooking, then quick-release. Also, verify your broth-to-rice ratio: 2 cups broth to 1.5 cups rice is perfect. If you used more liquid, drain excess after cooking. Pro tip: Undercooked rice is easier to fix than gummy rice!
Can I make this recipe with ground spices instead of whole?
but reduce amounts by half! Use 0.5 tsp ground cardamom, 0.25 tsp ground cinnamon, and 0.25 tsp ground cloves instead of whole pods. Skip toasting—just add them directly with the broth. The flavor will be milder but still delicious. For maximum aroma, toast 1 extra tbsp cumin seeds separately and sprinkle on top.
How do I store and reheat this aromatic rice?
Store in an airtight container for 4-5 days in the fridge or 3 months in the freezer. To reheat, sprinkle 1 tbsp water over the rice, cover, and steam for 2-3 minutes on high heat. For extra flavor, add a pinch of salt and a splash of broth. Never microwave dry—it makes rice rubbery!
What's the best way to serve this fragrant rice?
This versatile rice pairs perfectly with grilled meats, curries, or as a standalone side! For extra flair, top with toasted cumin seeds, chopped cilantro, and a drizzle of yogurt. It also works beautifully in burrito bowls, fried rice, or as a base for biryani. The warm spices make it ideal for fall/winter meals, but the lemon finish keeps it fresh for summer dishes too!