
Sauces & Condiments
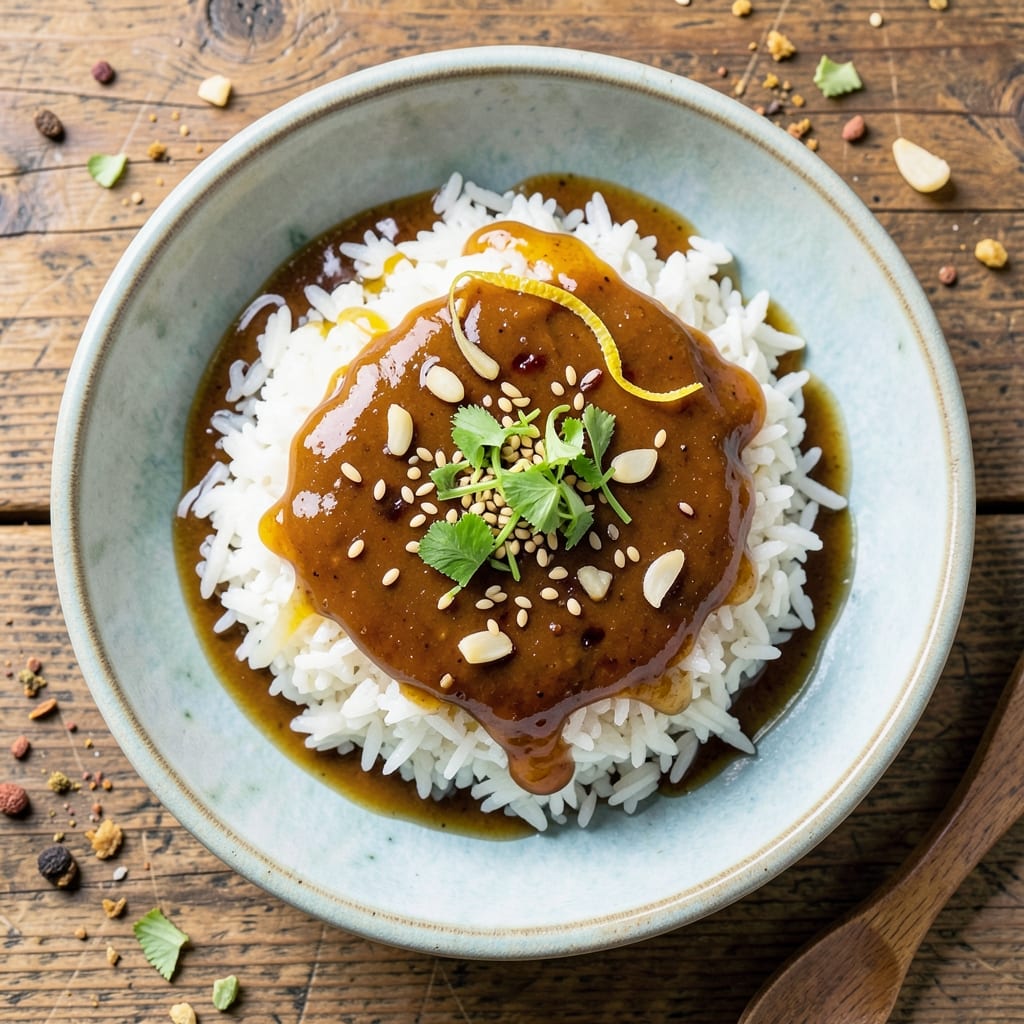
This Asian rice bowl sauce recipe delivers restaurant-quality flavor in just 5 minutes—no fancy techniques required. The secret lies in balancing umami from soy sauce, brightness from rice vinegar, and depth from garlic and ginger. I developed this sauce to elevate simple rice bowls into flavorful meals that impress every time.
What sets this sauce apart is its versatility and simplicity. With just a handful of pantry staples, you can create a foundation sauce that works with chicken, tofu, or vegetables. The key is adjusting the ratios of soy sauce, vinegar, and sweetener to suit your taste—whether you prefer it tangy, sweet, or boldly savory. Store it in the fridge for up to a week, making it perfect for meal prep.
Ingredients for asian rice bowl sauce
Pantry staples that transform into restaurant-quality flavor in minutes—no shortcuts needed.
| Ingredient | Amount | Notes |
|---|---|---|
| Low-Sodium Soy Sauce 🍶 | ½ cup | High-quality for umami depth |
| Rice Vinegar 🍶 | ¼ cup | White or seasoned variety |
| Sesame Oil 🫒 | 1 tbsp | Toasted for nutty aroma |
| Fresh Ginger 🌿 | 1 tbsp | Grated, not powdered |
| Garlic Cloves 🧄 | 3 cloves | Minced, not pre-minced jar |
| Honey 🍯 | 1 tbsp | Or maple syrup for vegan option |
| Sesame Seeds 🌾 | 1 tsp | Toasted for garnish |
| Toasted Sesame Oil 🫒 | 1 tsp | For finishing touch |
| Diamond Crystal Kosher Salt 🧂 | ½ tsp | Adjust to taste |
| Ground Black Pepper 🌶️ | ¼ tsp | Freshly cracked preferred |
The soy sauce is where the magic happens—Kikkoman or Lee Kum Kee are my go-tos, but any good-quality brand works. For rice vinegar, Mizkan has that perfect balance of tang and sweetness, but the white vinegar in your cabinet will do in a pinch. Fresh ginger and garlic are non-negotiable here; the jarred stuff just doesn't cut it. Penzeys sells pre-grated ginger if you're short on time, but I always grab the whole root to grate myself. Toast your sesame seeds in a dry pan for 30 seconds—they'll add crunch and aroma that jarred seeds can't match.
No sesame oil? Avocado oil or neutral oil at half the amount works, but you'll lose that nutty depth. Running out of honey? Maple syrup or agave keeps it vegan-friendly. The sauce is endlessly adaptable—double the soy for more umami, add a splash of mirin for sweetness, or a dash of sriracha for heat. For extra richness, stir in 1 teaspoon of miso paste at the end. And if you're making this ahead, store the sauce without the sesame seeds—they burn easily when reheated.
This sauce keeps beautifully for 1 week in the fridge, and the flavor actually improves as it sits. I like to portion it into small jars so I can grab exactly what I need for each bowl. Freeze for 3 months if you want to make a big batch—just thaw overnight in the fridge. The sesame seeds and oil can be added fresh when you're ready to use it. Pro tip: drizzle a little extra sesame oil over your rice before adding the sauce—it'll make everything taste like you spent hours in the kitchen.
Why You'll Love This Recipe
- Five-Ingredient Magic: This sauce comes together with just a knife, a spoon, and five pantry staples. No fancy techniques—just minced ginger, crushed garlic, and a splash of vinegar that brightens everything up in seconds.
- Umami Bomb: That low-sodium soy sauce packs a punch without the salt overload, while the toasted sesame oil adds a nutty depth. Honestly, the first time I tasted it, I nearly licked the bowl clean.
- Bowls for Days: Make a big batch on Sunday, and you’ve got the base for lunches, dinner leftovers, or even a quick takeout-style meal. I’ve used it on rice, noodles, roasted veggies—you name it.
- Budget-Friendly Flex: Fresh ginger and garlic might seem like small luxuries, but they stretch this sauce far. A little goes a long way, and the cost per serving? Less than a dollar. My wallet thanks me every time.
Step-by-step instructions for Asian rice bowl sauce
This sauce comes together faster than you can say "umami" - let's make it shine.
Prepare the Aromatics
In a small bowl, finely grate the 1 tablespoon of fresh ginger using a microplane or the smallest holes on a box grater. This ensures you capture all the zesty, aromatic oils without any fibrous texture. In a separate small bowl, mince the 3 cloves garlic as finely as possible using a sharp knife - you want a paste-like consistency rather than visible pieces.
Set both aside while you gather your remaining ingredients. The key here is freshness - pre-minced garlic loses its punch quickly, and powdered ginger lacks that bright, citrusy kick. If you're using maple syrup instead of honey, measure out 1 tablespoon now and set it aside with the other wet ingredients.
Combine Wet Ingredients
In a small saucepan or deep skillet, combine the 0.5 cup low-sodium soy sauce, 0.25 cup rice vinegar, 1 tablespoon sesame oil, and 1 tablespoon honey (or maple syrup). Place this over medium heat and bring to a gentle simmer, stirring occasionally to prevent scorching at the bottom.
This is where the flavor foundation builds. You'll see tiny bubbles forming around the edges - that's your signal to keep stirring. Let it simmer for 2-3 minutes until the mixture becomes slightly translucent and the aroma intensifies. The vinegar will start to cook off slightly, concentrating the flavors while maintaining that bright acidity we want in the final sauce.
Incorporate Aromatics and Season
Add the freshly grated ginger and minced garlic to the simmering sauce. Stir vigorously for 30-45 seconds until the raw aroma transforms into something warm and inviting. The garlic should become fragrant but not brown - we're aiming for aromatic, not bitter.
Now add the 0.5 teaspoon diamond crystal kosher salt and 0.25 teaspoon ground black pepper. Give everything one final stir and taste. This is your quality control moment - the sauce should be tangy from the vinegar, salty from the soy, with a touch of sweetness from the honey. If it needs more balance, add a tiny bit more honey or a splash of rice vinegar.
Finish and Rest
Remove the sauce from heat and stir in the 1 teaspoon toasted sesame oil. This final addition brings deep nutty complexity that elevates the entire dish. Let the sauce sit off the heat for 2-3 minutes - this resting period allows all the flavors to meld together perfectly.
Before using, give it one final taste adjustment. The sauce should coat the back of a spoon with a glossy sheen, indicating proper emulsification. If it's too thick, add 1 teaspoon warm water at a time until it reaches your desired consistency. For serving, drizzle generously over your rice bowl and sprinkle with 1 teaspoon toasted sesame seeds for that final crunchy, aromatic touch.
Pro Tips For Making Asian Rice Bowl Sauce
- COOK GARLIC LOW AND SLOW: I learned this the hard way—burnt garlic ruins everything. Sauté those cloves over medium-low heat until fragrant but not browned (about 2-3 minutes). High heat turns them bitter fast, and this sauce needs that sweet, mellow garlic flavor to shine.
- GRATE GINGER FINE: Skip the mincer if you’re in a rush, but don’t go too coarse. A microplane or the smallest holes on a box grater give you that smooth, bright ginger punch without clumps. Trust me, your sauce won’t taste like it’s hiding chunks.
- TEMPER SESAME OIL LAST: Add sesame oil at the very end—right when you’re done cooking. Heat destroys its delicate nutty aroma, and you want that aroma to hit your nose the second you pour the sauce. A few drops at the end makes all the difference.
- BALANCE SOY AND VINEGAR: Start with a 3:1 ratio of low-sodium soy to rice vinegar, then taste. If it’s too sharp, add a splash more soy; if it’s flat, a little extra vinegar brightens it up. Adjust gradually—you can’t fix it if you overdo one first.
Dietary considerations for these flavors
Gluten-Free Adaptations
For a gluten-free version, simply swap the low-sodium soy sauce for tamari—it delivers the same umami punch without gluten. I use San-J Tamari because it’s fermented longer, giving it deeper flavor. The rest of the ingredients stay the same, so you won’t miss the soy sauce at all. 🌱
Vegan-Friendly Swaps
This sauce is already vegan, but if you want extra richness, stir in 1 teaspoon white miso paste at the end for deeper umami. For sweetness, maple syrup or agave works perfectly in place of honey. Just
Low-Sodium Options
If you’re watching your sodium, reduce the soy sauce to 3 tablespoons and boost flavor with 1 teaspoon fish sauce (or coconut aminos for a plant-based option). The fish sauce adds complexity without extra salt, while coconut aminos provide a slightly sweeter, milder taste. Taste as you go—you might need a pinch more salt or a splash of vinegar to balance it.
Sweetener Alternatives
Honey isn’t the only way to sweeten this sauce. For a raw sugar option, dissolve 1 tablespoon in warm water first, then stir it into the sauce. Date syrup or blackstrap molasses add depth and work well in savory dishes. Just start with ½ teaspoon and adjust—some sweeteners are stronger than honey. 🍯
Allergy-Free Considerations
If sesame is a concern, replace sesame oil with neutral oil (like avocado or grapeseed) and omit the sesame seeds. For nut-free versions, check your honey label—some brands process honey in facilities with nuts. Always double-check ingredient labels, especially for vinegar (some brands add soy or wheat). The sauce remains safe and delicious with these simple swaps.
Nutrition facts
Frequently asked questions
Can I make this sauce without sesame oil?
Replace the 1 tablespoon sesame oil with ½ tablespoon neutral oil (like avocado or grapeseed) plus ½ teaspoon toasted sesame paste if you have it. The flavor will be slightly different but still delicious. For a completely sesame-free version, just use the neutral oil and add a pinch of smoked paprika for depth.
How can I adjust the sauce for spicy rice bowls?
Add ½ teaspoon sriracha or 1 teaspoon gochujang during the final resting phase. For extra heat, stir in ½ teaspoon chili crisp or a dash of red pepper flakes. Start with less—you can always add more, but you can't take it out! Balance with a splash of rice vinegar if it becomes too intense.
Will this sauce work with cold rice bowls?
Yes, but with a few tweaks. Warm the sauce slightly before drizzling to enhance aroma, and add a ½ teaspoon toasted sesame oil directly to the rice for extra richness. For extra freshness, toss in 1 teaspoon chopped scallions or cilantro right before serving. The sauce's tangy-sweet balance shines even better on chilled rice!
Can I make this sauce ahead of time? This sauce actually tastes better after 24 hours! Store it in an airtight container in the fridge for up to 1 week. The flavors meld beautifully, and it's perfect for meal prep. Just
What if my sauce tastes too salty?
Dilute with 1 teaspoon warm water at a time until balanced, or add 1 teaspoon rice vinegar to cut the saltiness. For extra depth, stir in ½ teaspoon honey or 1 teaspoon mirin to restore sweetness. Always taste as you go—small adjustments make the biggest difference!