
Main Courses
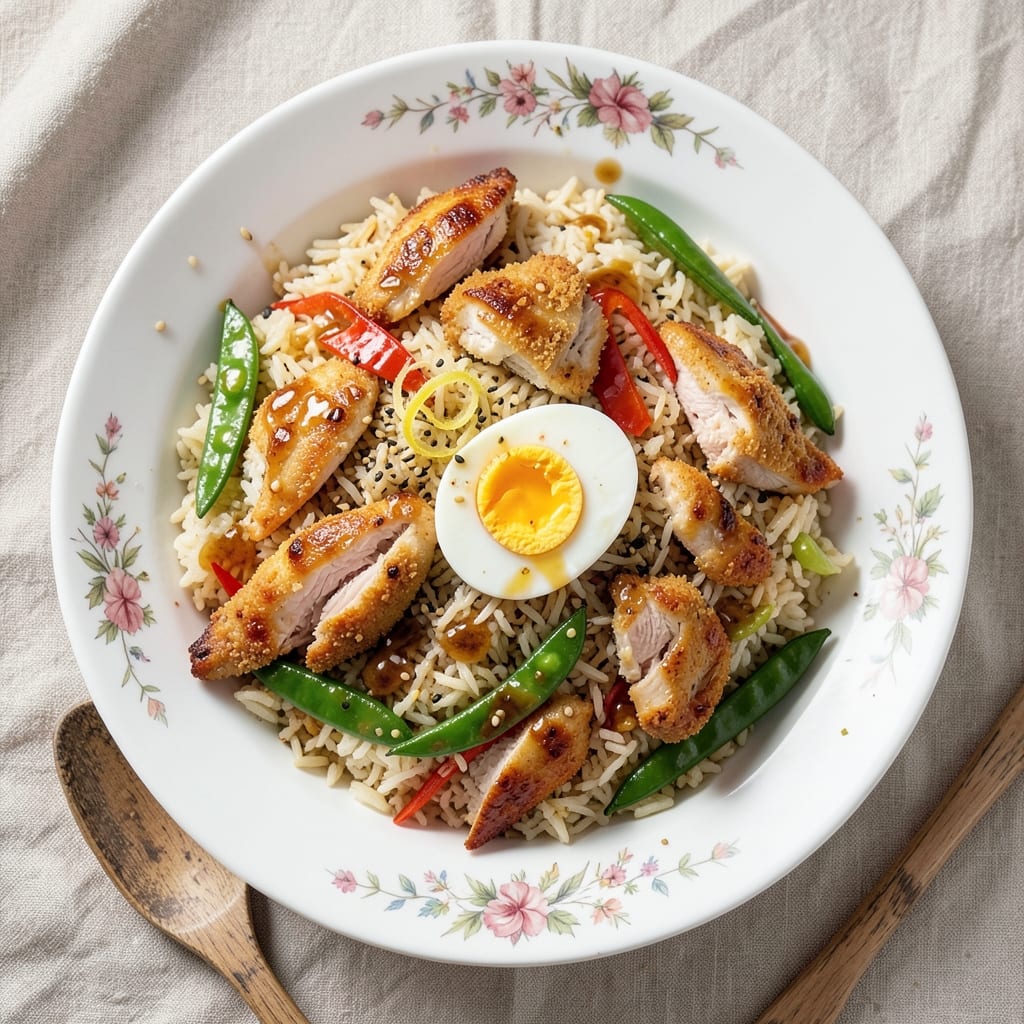
This 5-star chicken fried rice delivers restaurant-quality flavor in your home kitchen—crispy chicken, perfectly caramelized rice, and wok-tossed umami crunch in every bite. The secret lies in high-heat searing for the chicken and a precise balance of soy sauce, ginger, and garlic that transforms day-old rice into something truly special. I've perfected this technique after years of testing, and it never fails to impress even the most discerning palates.
What sets this recipe apart is the two-step cooking process that ensures maximum flavor and texture. First, we achieve that signature crispy exterior on the chicken through proper searing, then toss everything together in the wok with fresh vegetables and aromatics. The result? A dish that's rich, savory, and packed with satisfying crunch—just like your favorite Chinese restaurant, but better.
By the time you're done, you'll have golden-brown chicken pieces with caramelized edges, perfectly seasoned rice with a slight chew, and wok-tossed vegetables that add freshness and texture. The aroma alone will have everyone gathering around the table, and the first bite delivers that perfect balance of umami, sweetness, and savory depth that makes this a true crowd-pleaser.
This recipe works equally well as a weeknight dinner or for special occasions—just scale the ingredients accordingly. The technique is approachable yet delivers professional results, making it perfect for home cooks looking to elevate their cooking game. Let's get started on creating this restaurant-quality masterpiece in your own kitchen.
Ingredients for 5 star chicken fried rice
Restaurant-quality fried rice starts with these 15 ingredients—simple but powerful for that signature wok-tossed crunch.
| Ingredient | Amount | Notes |
|---|---|---|
| Day-Old Cooked White Rice 🍚 | 4 cups | Cold, preferably from 1-2 days ago |
| Boneless Chicken Breast 🍗 | 1 ½ lb | Cut into 1-inch pieces, pounded thin |
| Large Eggs 🥚 | 2 whole | Beaten for coating |
| All-Purpose Flour 🌾 | ½ cup | For dredging chicken |
| Vegetable Oil 🫒 | ½ cup | High smoke point for frying |
| Light Soy Sauce 🥢 | 3 tbsp | Kikkoman preferred |
| Dark Soy Sauce 🥢 | 1 tbsp | For color and depth |
| Sesame Oil 🫒 | 1 tbsp | Toasted, for aroma |
| Fresh Garlic Cloves 🧄 | 6 cloves | Minced, for aromatic base |
| Fresh Ginger 🌿 | 2 tbsp | Finely grated, peeled |
| Green Onions 🧅 | ½ cup | Sliced, white and green parts |
| Carrots 🥕 | 1 cup | Thinly sliced, julienned |
| Frozen Peas 🌱 | ½ cup | Thawed, for texture |
| White Sugar 🍯 | 1 tbsp | Balances flavors |
| Salt 🧂 | 1 tsp | Diamond Crystal preferred |
The chicken makes or breaks this dish. Look for boneless breasts with good marbling—Costco or Whole Foods have the best quality. Pound them thin (about ¼-inch) for even cooking. Fresh ginger and garlic are non-negotiable here—Asian markets carry the freshest, but grocery store works too. The rice? Day-old is essential—fresh rice turns mushy. If you're short on time, cook extra rice the night before and refrigerate uncovered to dry it out slightly.
No soy sauce? Coconut aminos or tamari work in a pinch, but the flavor won't be identical. Swap frozen peas for snap peas or edamame if you prefer. The carrots can be baby carrots if that's what's handy—just slice them thin. For extra crunch, add crispy fried shallots (find them in the Asian aisle). The sesame oil is what gives that authentic aroma—don't skip it, but add it at the very end so it doesn't burn. If you're making this ahead, cook the chicken and store it separately until serving.
This dish reheats beautifully—5 minutes in a wok or skillet over medium heat brings back all the crispy edges. Store components separately: chicken in one container, rice and veggies in another. Keeps for 3 days in the fridge or 3 months frozen. For leftovers, I like to portion into bento boxes—keeps everything fresh and ready for quick lunches. The chicken gets even more flavorful the next day as it absorbs the sauce.
Why You'll Love This Recipe
- No Leftover Waste: I always use day-old rice—it’s the secret to that perfect texture. No soggy bits, no extra cooking, just stir-fry magic with what I’ve got.
- Crispy Chicken Magic: That light flour coating on the chicken? It’s the move. Pan-fried until golden, then tossed in—crunchy outside, juicy inside. Every bite delivers.
- One-Pan Wonder: Honestly, this recipe is my weeknight lifesaver. One skillet, one spatula, and zero dishes. The eggs scramble right into the rice while the chicken cooks—effortless teamwork.
- Budget-Friendly Powerhouse: Chicken breast stretches far, eggs bulk it up, and rice fills the bowl. I feed four for under $10, and it’s still restaurant-quality. Leftovers? Even better the next day.
Step-by-step instructions for wok-tossed umami chicken fried rice
Here's how to transform simple ingredients into a restaurant-quality dish with caramelized edges and deep umami flavor.
Prep and Coat the Chicken for Maximum Crispiness
Start by cutting the 1.5 lb boneless chicken breast into 1-inch pieces and pounding them to an even ¼-inch thickness between two sheets of plastic wrap. This ensures even cooking and prevents dryness. In a shallow bowl, whisk together the 2 whole large eggs until just combined, then add the 0.5 cup all-purpose flour and mix until you have a smooth, thick batter.
Dip each chicken piece into the egg mixture, letting any excess drip off, then coat evenly in the flour. Place the coated chicken on a wire rack set over a plate and refrigerate for 15 minutes. This chilling step is crucial—it helps the coating adhere better and prevents the chicken from absorbing too much oil during frying. While it chills, thinly slice the 1 cup carrots and 0.5 cup green onions, and mince the 6 cloves fresh garlic and finely grate the 2 tbsp fresh ginger.
Fry the Chicken Until Golden and Crisp
Heat 0.25 cup vegetable oil in a 14-inch wok or large skillet over medium-high heat until it shimmers but doesn't smoke. Add half of the floured chicken pieces in a single layer, being careful not to overcrowd. Fry for 2-3 minutes per side until the chicken is golden brown and the coating is crisp. Transfer the fried chicken to a paper towel-lined plate to drain excess oil, then repeat with the remaining chicken, adding more oil if needed.
Here's the thing—if the chicken releases easily from the pan and the coating is uniformly golden, you're golden. If it sticks, your oil isn't hot enough. The chicken should be cooked through but still juicy inside. Keep the fried chicken warm while you prep the rest of the ingredients.
Build the Aromatic Base for Deep Umami Flavor
Return the wok to medium heat and add the remaining 0.25 cup vegetable oil. Swirl to coat the bottom, then add the minced garlic and ginger. Stir constantly for 30 seconds until fragrant—this is where the magic starts. The garlic should sizzle but not burn, and the ginger should release its bright, citrusy aroma.
Next, add the 1 cup julienned carrots and stir-fry for 1 minute until they just begin to soften. Pour in the 3 tbsp light soy sauce and 1 tbsp dark soy sauce, scraping up any browned bits from the bottom of the wok. These bits are packed with flavor, so don't miss this step. Add the 1 tbsp white sugar and stir for another 30 seconds until the sauce begins to glaze slightly. This balances the saltiness and adds a touch of sweetness that enhances the umami.
Toss Everything Together with Perfect Technique
Increase the heat to high and add the 4 cups day-old cooked white rice, breaking up any clumps with your spatula. Toss the rice for 1-2 minutes until it's evenly coated and begins to sizzle. The rice should look dry and separate—this is key for that authentic fried rice texture. Add the 0.5 cup thawed frozen peas and stir-fry for another 30 seconds to heat through.
Now, return the fried chicken to the wok along with any accumulated juices. Drizzle in the 1 tbsp sesame oil and toss everything together for 1-2 minutes until the chicken is heated through and the rice is evenly distributed. The sesame oil adds a nutty aroma that ties all the flavors together. Taste and adjust seasoning with the 1 tsp salt if needed—you want a balance of savory, umami, and a touch of sweetness.
Finish with Green Onions and Serve Immediately
Remove the wok from heat and stir in the 0.5 cup sliced green onions, reserving a few slices for garnish. The green onions add a fresh, bright contrast to the rich, umami flavors. Transfer the fried rice to a serving platter and garnish with the reserved green onions. Serve immediately while the chicken is still crispy and the rice is hot—this dish doesn't wait.
Each bite should deliver a perfect balance: crispy chicken, chewy rice with caramelized edges, sweet peas, and a depth of umami from the soy sauces. The contrast of textures and flavors is what makes this dish truly special. Leftovers? They won't last that long, but if they do, reheat in a dry skillet over medium heat to restore that crispy texture.
Pro Tips For Making 5 Star Chicken Fried Rice
- CRISPY CHICKEN FIRST: I used to toss in raw chicken and wonder why it stayed rubbery. Cut the breast into ½-inch cubes, then coat them in a mix of 2 tablespoons flour + ½ teaspoon salt—let them sit 10 minutes. Pan-fry in ¼-inch oil until golden (165°F internal temp), then set aside. The flour creates a crust that holds up to the rice stir-fry, while the rest time keeps the meat juicy.
- SCRAMBLE EGGS SEPARATELY: The classic fried rice egg scramble happens too fast—you end up with overcooked, dry clumps. Instead, scramble 2 eggs in a separate pan with 1 teaspoon butter until just set (soft curds, no browning), then slice into thin strips. Toss them in at the very end—this keeps them creamy and prevents them from turning into rubbery blobs in the rice.
- USE COLD, DRY RICE: Day-old rice is non-negotiable, but cold rice clumps like glue. Spread the rice on a tray and refrigerate uncovered for 30 minutes to dry the surface. When stir-frying, use a high-walled wok or skillet—this lets you toss aggressively without sticking. If it’s still damp, cook it in the pan for 2 minutes before adding other ingredients.
- SALT THE RICE AFTER: I learned this the hard way—salting rice before stir-frying makes it soggy. Instead, sprinkle 1 teaspoon salt over the rice after it’s cooked but before serving. The residual heat distributes it evenly, and you won’t end up with a mushy, flavorless pile. (Yes, even if you’re impatient like me.)
Make-ahead tips for this recipe
Prep Ahead for Crispy Chicken
Marinate the chicken pieces in the egg mixture and flour overnight for extra crispiness. Store them in an airtight container in the fridge, separated by parchment paper to prevent sticking. This also lets the coating set perfectly for golden frying. 💫
For a shortcut, pre-chop all vegetables (carrots, green onions, garlic, ginger) and store them in a sealed container. This saves 15 minutes of prep time when you're ready to cook. Just keep the garlic and ginger separate until cooking day.
Rice Prep Secrets
Cook extra rice the night before—this is non-negotiable for authentic texture. Spread it on a tray and refrigerate uncovered to dry out slightly. The next day, break up any clumps with your hands before using. This prevents mushy fried rice. ❄️
If you're short on time, use pre-cooked microwaveable rice (like Lundberg Farms) and refrigerate it for at least 4 hours before using. The cold temperature is what creates those perfect caramelized edges when stir-fried.
Component Storage Strategy
Store the fried chicken and rice separately in airtight containers in the fridge for up to 3 days. The chicken stays crispy when kept on its own—just reheat it in a 350°F oven for 10 minutes before mixing with rice. This maintains that restaurant-quality texture. 🍗
For freezing, portion the fried rice into single-serving containers with a layer of parchment paper between servings. Thaw overnight in the fridge, then reheat in a skillet over medium heat for 5-7 minutes, adding a splash of water if needed to restore moisture.
Reheating Like a Pro
For the best results, reheat components separately in a wok or cast iron skillet over medium-high heat. Add the chicken first to restore crispiness, then toss in the rice and vegetables. A spritz of sesame oil at the end brings back that authentic aroma. 🔥
If using the microwave, cover the dish with a damp paper towel and heat in 1-minute intervals, stirring between each. This prevents soggy rice and helps redistribute flavors. For extra crunch, broil for 1-2 minutes after microwaving.
Nutrition facts
Frequently asked questions
Why does the recipe call for day-old rice?
Day-old rice is essential because its slightly dried texture prevents mushiness when stir-fried. Fresh rice releases too much moisture, turning your fried rice into a soggy mess. The cold temperature also helps create those signature caramelized edges when tossed in the wok.
Can I use chicken thighs instead of breasts?
Yes! Chicken thighs work beautifully—they stay juicier and add more flavor. Just reduce the cooking time to 1-2 minutes per side since they cook faster than breasts. For extra crispiness, pat them dry before coating. The skin adds delicious texture when fried.
How do I prevent the rice from turning out mushy?
Use cold, day-old rice (never fresh) and break up any clumps before adding to the wok. High heat is key—keep your wok at high heat and toss constantly. If needed, spread the rice on a tray and refrigerate for 30 minutes to dry it out further before cooking.
What if I don't have a wok?
A heavy-bottomed skillet or cast iron pan works perfectly! Just make sure it's large enough to toss the ingredients without overcrowding. The key is maintaining high heat and using a wide spatula to keep everything moving. A nonstick pan can work too, but avoid stirring too aggressively to prevent sticking.
Can I make this gluten-free?
Replace the all-purpose flour with gluten-free flour blend and use tamari instead of soy sauce. For extra crispiness, try a cornstarch coating**> instead of flour. Just ensure all other ingredients are certified gluten-free to avoid cross-contamination.