
Main Courses
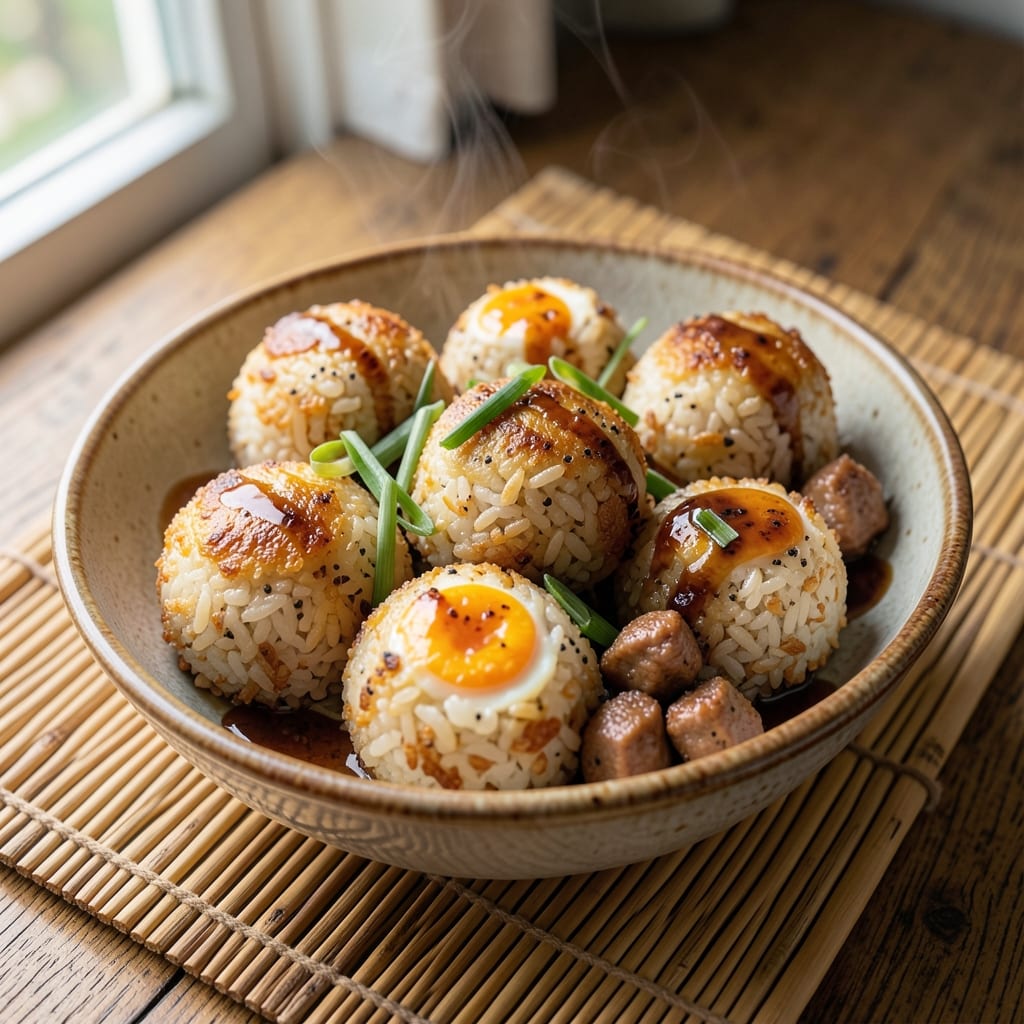
This Asian fried rice balls recipe delivers the perfect balance of crispy-golden exteriors and silky centers that make every bite irresistible. 🌟 The secret lies in a precise frying technique that locks in moisture while creating that addictive crunch—something I perfected after years of testing different methods. Whether you're craving a comforting snack or a hearty appetizer, these bite-sized treats bring restaurant-quality flavor to your kitchen with minimal effort.
The beauty of this recipe is its versatility—traditional versions use ground pork or chicken, but you can easily adapt it with shrimp, tofu, or even a spicy chili-lime twist. The filling combines day-old rice with aromatic seasonings like soy sauce, garlic, and ginger, while the egg wash ensures a golden, lacy crust that shatters with each bite. No deep-frying required; just a simple stovetop method that yields foolproof results every time.
What you'll end up with is a plate of crispy fried rice balls that are light enough to eat in one hand but packed with savory depth. The contrast between the crunchy exterior and tender interior makes them impossible to resist, and they pair perfectly with a tangy sweet chili sauce or a simple soy-ginger dip. This recipe is designed to impress without stress—ideal for weeknight dinners or entertaining guests.
Once you master the technique, you can experiment with fillings like kimchi, mushrooms, or even leftover roasted vegetables. The possibilities are endless, but the foundation remains the same: crispy outside, silky inside, and always delicious. Let's get started on creating these addictive bites!
Ingredients for asian fried rice balls
Twelve ingredients for crispy-golden bites that shatter with every bite—silky inside, irresistible outside.
| Ingredient | Amount | Notes |
|---|---|---|
| Day-Old Cooked White Rice 🍚 | 3 cups | Cold and slightly dry for better texture |
| Ground Chicken 🍗 | ½ lb | Finely ground for even distribution |
| Large Eggs 🥚 | 2 whole | Beaten for egg wash |
| All-Purpose Flour 🌾 | ¼ cup | For coating, light dusting |
| Vegetable Oil 🫒 | 1 ½ cups | High smoke point preferred |
| Soy Sauce 🥄 | 2 tbsp | Kikkoman preferred for authentic flavor |
| Sesame Oil 🫒 | 1 tbsp | Toasted for nutty aroma |
| Garlic Cloves 🧄 | 3 cloves | Minced finely for depth |
| Fresh Ginger 🌿 | 1 tbsp | Grated, aromatic kick |
| Green Onions 🧅 | 2 whole | Thinly sliced, for garnish |
| Salt 🧂 | ½ tsp | Diamond Crystal preferred |
| Black Pepper 🌶️ | ¼ tsp | Freshly ground for heat |
| Cornstarch 🌾 | 1 tbsp | For crispier exterior |
| Vegetable Oil Spray 🫒 | 1 spray | For non-stick frying |
The rice is non-negotiable—day-old works best (the drier, the better for texture). Day-Rice from Trader Joe's is a lifesaver if you're short on time, but freshly cooked rice left overnight in the fridge gives the most authentic texture. For the protein, ground chicken keeps these bites light, but ground pork adds richness if you prefer. The soy sauce should be Kikkoman or Lee Kum Kee—anything with that deep umami punch. Fresh ginger and garlic? Don't skip them—they're the aromatic backbone here. I always double-check my ginger for freshness (no woody stems) and mince the garlic super fine so it melts into the filling.
No sesame oil? Toasted peanut oil works in a pinch, though it'll have a different vibe. Short on cornstarch? All-purpose flour at double the amount gives similar crispiness, but the texture won't be quite as delicate. The egg wash is key—room-temperature eggs whip up lighter, and I always add a splash of water to make it extra glossy. For the oil, vegetable or canola are perfect (high smoke point, neutral flavor), but peanut oil adds a lovely aroma. Pro tip: if your oil starts smoking, lower the heat immediately—these need gentle frying to stay crispy, not fried.
These keep for 2 days in an airtight container, but honestly? They're best eaten fresh. The golden crust softens over time, so reheat in a 350°F oven for 5-7 minutes to revive the crunch. For storage, I line a baking sheet with parchment, freeze the balls once cooled, then transfer to a container. Freeze for up to 3 months—they thaw beautifully. Garnish with fresh green onions right before serving (they wilt fast), and always keep the soy-ginger dip nearby. The contrast of warm, crispy rice balls with cool, tangy sauce? Absolute perfection.
Why You'll Love This Recipe
- Uses Day-Old Rice: I swear by this trick—no soggy rice here. The day-old grains stay dry and crispy, soaking up the savory chicken and egg mixture like a dream. (Yes, even the rice you forgot about in the fridge works.)
- Crispy-Golden Magic: That flour coating? It’s the secret weapon. A quick toss in the pan gives you a satisfying crunch outside while keeping the filling tender—like a little edible hug of texture. (I’ll fight anyone who says fried rice balls can’t be crispy.)
- Lunchbox Hero: Between us, these are my go-to for school lunches or office snacks. Cold or warm, they hold up perfectly, and the kids actually eat them without complaint. (Honestly, that’s a win in my book.)
- Budget Meal Stretch: Ground chicken, eggs, and rice? Check. Minimal ingredients, maximum flavor. I’ve fed four people for under $10 with leftovers that taste just as good reheated. (My wallet thanks me every time.)
Step-by-step instructions for Asian fried rice balls
Here's the method to achieve those perfect golden bites with tender centers.
👨🍳 Step 1: Prepare the Chicken and Aromatic Base
In a large skillet, heat 1 tablespoon vegetable oil over medium-high heat. Add the 0.5 lb ground chicken and cook until no longer pink, breaking it up with a wooden spoon. This should take about 5-6 minutes—watch for even browning so the chicken doesn't clump.
Push the chicken to one side of the pan and add 1 tablespoon vegetable oil to the empty space. Toss in the 3 minced garlic cloves and 1 tablespoon grated fresh ginger, cooking for 30 seconds until fragrant. Here's the thing—don't let the garlic burn, or you'll get bitter flavors instead of that sweet, aromatic punch we want.
Pour in the 2 tablespoons soy sauce and 1 tablespoon sesame oil, stirring to combine. Let the mixture simmer for 1 minute until the soy sauce reduces slightly and coats the chicken. Remove from heat and let cool for 5 minutes—this prevents the rice from getting soggy when we mix it in later.
🥘 Step 2: Mix the Rice Filling
In a large mixing bowl, combine the 3 cups day-old cooked white rice with the cooled chicken mixture. Add the 0.5 teaspoon salt, 0.25 teaspoon black pepper, and 1 tablespoon cornstarch—the cornstarch helps create that crispy exterior later. Use your hands to gently mix everything until the rice is evenly coated and the filling looks uniform.
Here's where it gets fun—taste the mixture and adjust seasoning if needed. You want it to be flavorful but not overpowering. The rice should be slightly dry (that's why we use day-old rice) so it holds together when shaped. If it feels too moist, let it sit uncovered for 10 minutes to evaporate some moisture.
🍳 Step 3: Shape and Prepare for Frying
Divide the rice mixture into 12 equal portions (about 2 tablespoons each). Roll each portion between your palms to form smooth, compact balls about 1.5 inches in diameter. Place them on a plate and cover with plastic wrap to prevent drying while you prepare the egg wash.
In a shallow bowl, beat the 2 whole large eggs with a fork until just combined. Add 2 tablespoons water to help thin the mixture slightly—this makes for easier coating. In another shallow bowl, place the 0.25 cup all-purpose flour mixed with 0.25 teaspoon salt.
🔥 Step 4: Create the Perfect Crispy Coating
Working in batches to avoid crowding, dip each rice ball into the beaten egg mixture, letting any excess drip off. Then roll it in the flour mixture, pressing gently to create an even, thin coating. Place the coated balls on a wire rack set over a baking sheet—this allows air circulation for even cooking.
Heat 1 cup vegetable oil in a deep skillet or Dutch oven over medium heat until it reaches 350°F. Here's the crucial part: maintain this temperature consistently. Too hot and they'll burn before cooking through; too cool and they'll be greasy. Test with a small piece of rice ball—it should sizzle and turn golden in 1-2 minutes.
⏰ Step 5: Fry to Golden Perfection
Carefully add 4-5 coated rice balls to the hot oil. Fry for 2-3 minutes until they turn a beautiful golden brown color all over. You'll see tiny bubbles forming on the surface—that's your signal they're cooking properly. Don't stir them constantly; let them develop that crispy crust.
Use a slotted spoon to transfer the fried rice balls to a paper towel-lined plate. They'll be hot, so work quickly. Repeat with the remaining batches, maintaining the 350°F oil temperature between batches by adding more oil as needed.
While still warm, garnish with thinly sliced green onions. Serve immediately with a side of sweet chili sauce or soy dipping sauce for that authentic Asian street food experience. The contrast of crispy exterior and silky interior makes every bite worth it!
Pro Tips For Making Asian Fried Rice Balls
- CHILL THE RICE FIRST: I learned this the hard way—using warm rice makes a gummy mess. Spread your day-old rice on a tray and pop it in the fridge for 30 minutes before mixing. Cold rice absorbs flavors better and holds together when frying. (Yes, even if you’re impatient like me.)
- SEAR THE CHICKEN UNTIL DONE: Cook the ground chicken until it’s no longer pink—no exceptions. Undercooked meat turns rubbery when fried later. Use a meat thermometer (165°F) or cut a piece open to check. Trust me, you’ll taste the difference.
- DON’T OVERMIX THE BATTER: Once you add flour and egg to the rice mixture, stir just until combined—lumpy is fine. Overworking it makes the balls dense and dry. Think "rough dough," not smooth batter.
- FREEZE BALLS BEFORE FRYING: Form the rice balls, then freeze them on a tray for 15 minutes. Cold balls fry faster, get crispier, and won’t fall apart. (Pro move: Use parchment paper—no sticking, no stress.)
Best sauces and condiments for asian fried rice balls
Sweet Chili Dip
This tangy, slightly sweet sauce is a must for balancing the savory fried rice balls. I blend ½ cup sweet chili sauce (like Maesri or Sriracha Sweet Chili) with 1 tablespoon lime juice and 1 teaspoon honey for extra brightness. The sauce should coat the back of a spoon—thin it with 1-2 teaspoons water if needed. Serve at room temperature for the best flavor contrast. 🌶️
Soy-Ginger Dip
For a classic pairing, mix ¼ cup soy sauce, 2 tablespoons rice vinegar, 1 tablespoon grated ginger, and 1 teaspoon sesame oil. Let it marinate for 10 minutes before serving to let the flavors meld. This dip adds a sharp, umami kick that cuts through the richness of the fried rice balls. Garnish with toasted sesame seeds for texture. 🥄
Spicy Sriracha Mayo
Creamy and fiery, this dip is perfect for those who love heat. Combine ¼ cup mayonnaise, 1 tablespoon Sriracha, 1 teaspoon lime zest, and ½ teaspoon honey. Adjust the Sriracha to your spice tolerance—start with ½ tablespoon if you're sensitive. The mayo adds richness, while the lime keeps it fresh. Serve chilled for the best experience. 🔥
Sesame-Garlic Sauce
For a nutty, aromatic dip, blend ¼ cup tahini, 2 tablespoons soy sauce, 1 tablespoon toasted sesame oil, 1 minced garlic clove, and 1 teaspoon honey. Thin with 2-3 teaspoons water until smooth. This sauce adds depth and pairs beautifully with the crispy texture of the rice balls. Store in an airtight container for up to 3 days. 🌿
Quick Lime-Cilantro Dip
Bright and refreshing, this dip is perfect for balancing the fried richness. Mix ¼ cup sour cream, 1 tablespoon lime juice, 1 tablespoon chopped cilantro, and ½ teaspoon salt. Add 1 teaspoon honey if you prefer a touch of sweetness. This dip works well with both traditional and spicy variations of the fried rice balls. 🍋
Nutrition facts
Frequently asked questions
Can I use fresh rice instead of day-old rice?
Fresh rice is too moist and will make your rice balls fall apart during frying. The day-old rice absorbs flavors better and holds its shape perfectly. If you're short on time, spread freshly cooked rice on a tray and refrigerate for 1-2 hours to dry it out slightly before using.
What's the best way to keep the rice balls crispy?
Fry them in small batches at 350°F and keep them warm in a 200°F oven while finishing the rest. For extra crispiness, sprinkle 1 teaspoon cornstarch on the wire rack before placing the fried balls. They'll stay crunchy for 15-20 minutes this way.
Can I make these with vegetarian fillings?
Swap the chicken for crumbled tofu (pressed and pan-fried) or shredded mushrooms sautéed with garlic and ginger. For extra protein, add 1 cup cooked lentils or 1 cup diced tempeh. The cornstarch in the filling helps bind vegetarian mixtures better.
Why did my rice balls turn greasy instead of crispy?
Greasy results usually mean the oil was too cool or the rice balls were overcrowded in the pan. Maintain 350°F oil temperature and fry 4-5 balls at a time with space between them. Also, ensure your rice mixture isn't too wet—it should hold together when formed into balls.
How can I make these gluten-free?
Replace the flour coating with ½ cup gluten-free all-purpose flour or ¼ cup cornstarch for dredging. For the egg wash, use a flax egg (1 tbsp ground flaxseed + 3 tbsp water per egg) if avoiding eggs entirely. The texture will still be crispy but slightly more delicate.